Ah, yes, GAS, Gear Acquisition Syndrome. It happens to the best of us. So if the thought of a new hardware super-controller by Stereoping is giving you sweaty palms, especially as you learn that it will also be available for Microwave, MKS-80, and Rhodes Chroma, you’d better not read on. The specs I’ve got for you would only make you GAS much, much worse. Continue reading →
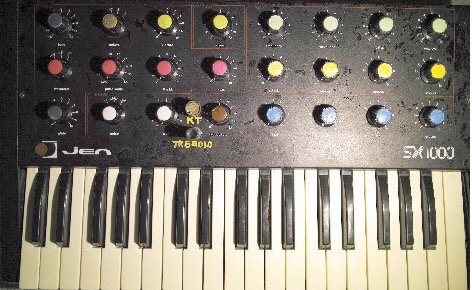
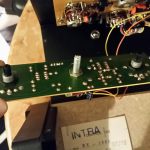
This knob is a good place to start: The “glide” potentiometer is in charge of portamento, and it is one of the first things that might make Jenny fail (see Neil Johnson’s site). A faulty glide pot means that the synth will only ever play the same note regardless of which key you press. So I did replace that pot, which is pretty straightforward – you’ll find some pictures in this gallery. (It is a 2.2M linear type BTW.)
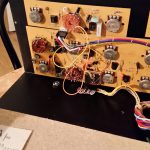
The Glide pot is in the upper left corner of this picture. As you can see it is sitting on a small PCB together with the Noise switch and pot. Remove the knobs and the nuts from the axes of all three, and you can take out the board to replace the potentiometer.
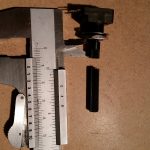
The pot needs to have a 10mm shaft and a 5mm diameter axis. Cut off the axis at about 10mm – which makes the distance from the end of the shaft to the top of the pot 20mm.
Pot soldered and screwed to the PCB. Ready to re-insert and re-attach the board into Jenny’s panel.
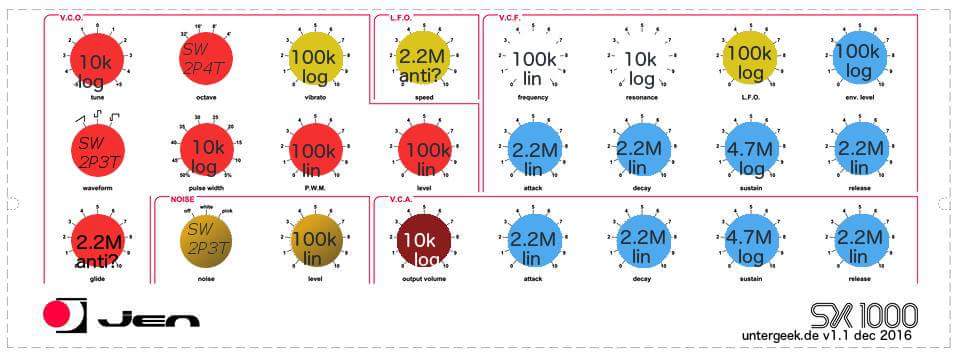
Overview of potentiometer values
This is an overview of the potentiometer values, some of them are linear, some logarithmic, a few antilog. The most obvious candidates for replacement, apart from the glide pot, would be Frequency (100k) and Resonance (100k) for the filter, and Tune (10k).
Der Grund, warum mein oller, aber treuer Polo neulich höchst melodramatisch mit dampfendem Motor und kochendem Kühlwasser liegen geblieben ist: Das Antriebsturbinen-Rad der Kühlwasserpumpe – also gewissermaßen der Motor für die Kühlung – ist einfach abgebrochen. Dem Mechaniker in der Werkstatt meines Vertrauens ist es spürbar ein Bedürfnis, mir das havarierte Teil zu zeigen. “Inzwischen mache se die nemmer aus Kunststoff”, meint er.
Besser is das.
Extradank an Lars, der uns gerettet hat und nun auch mal in diesem Internet erwähnt ist.
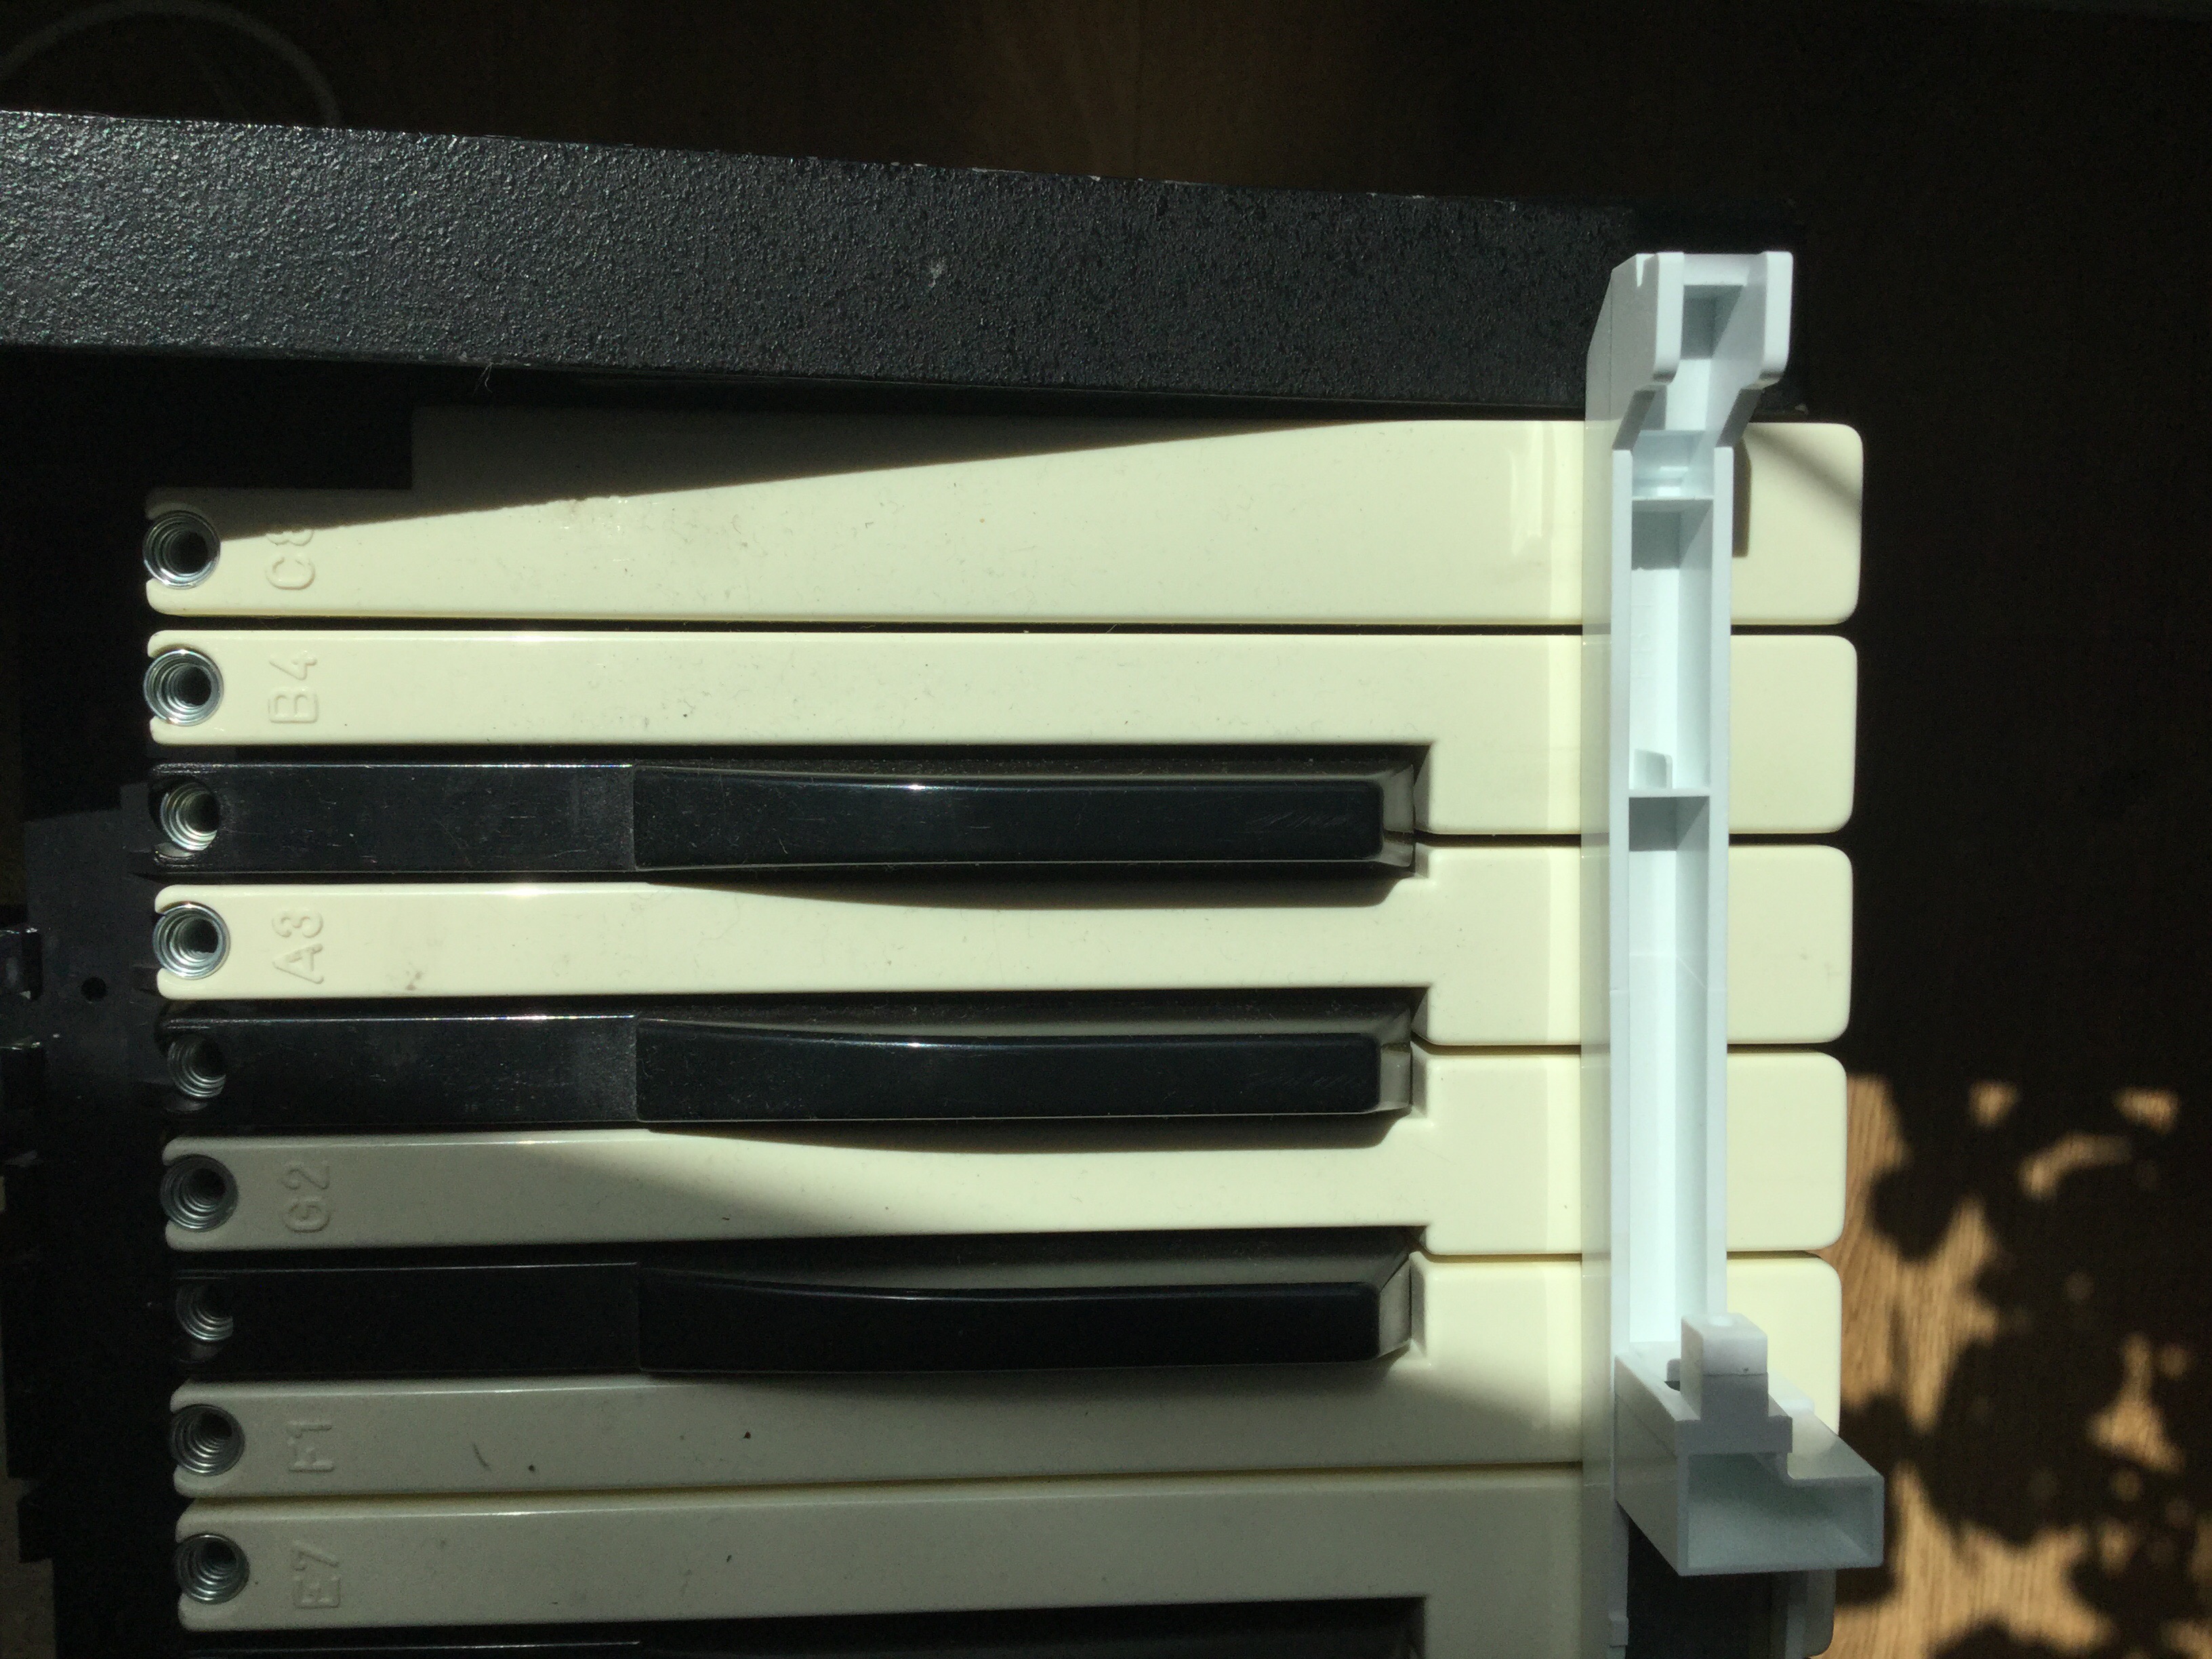
Jenny – my old 70s monosynth – is a beauty, and I love her knobby face. Her smile, though, has yellowed over the decades. So to make Jenny even more attractive, I decided to try and bleach the keys with hydrogen peroxide.
TL;DR: Effect has been minimal, so it’s probably not worth it. But it was fun. If you try it, make the Retrobright bleaching gel, don’t use a hydrogen peroxide bath. And have a good UV source.
Jenny’s keyboard compared to a key from a mid-80s Roland JX8P synth
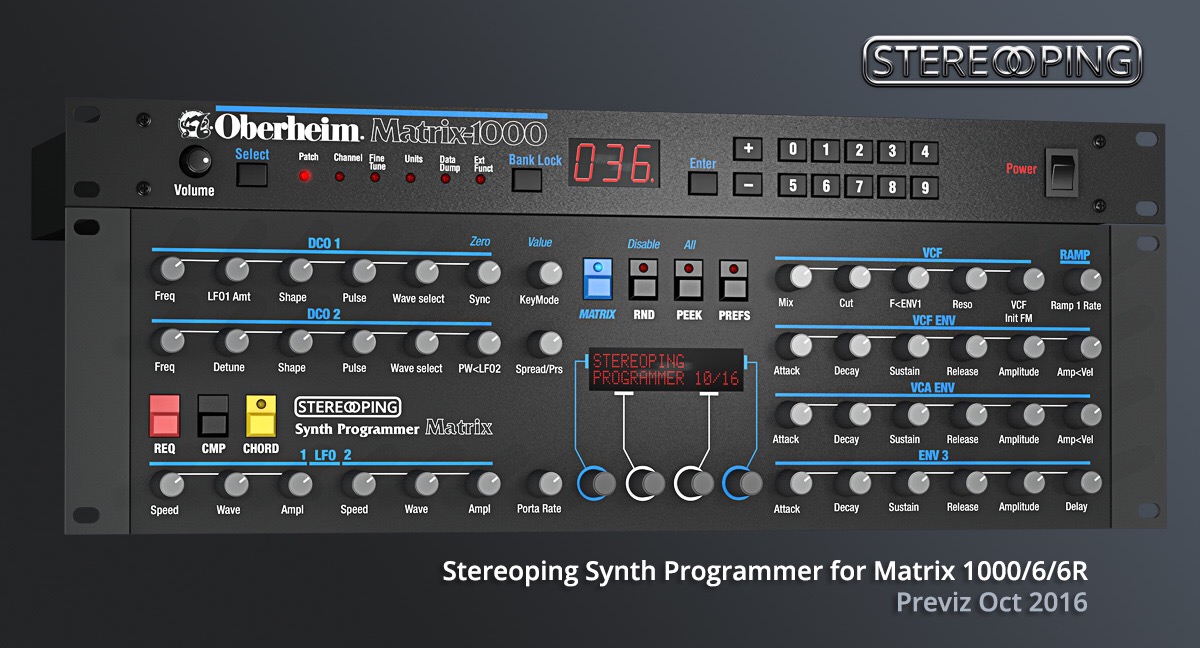
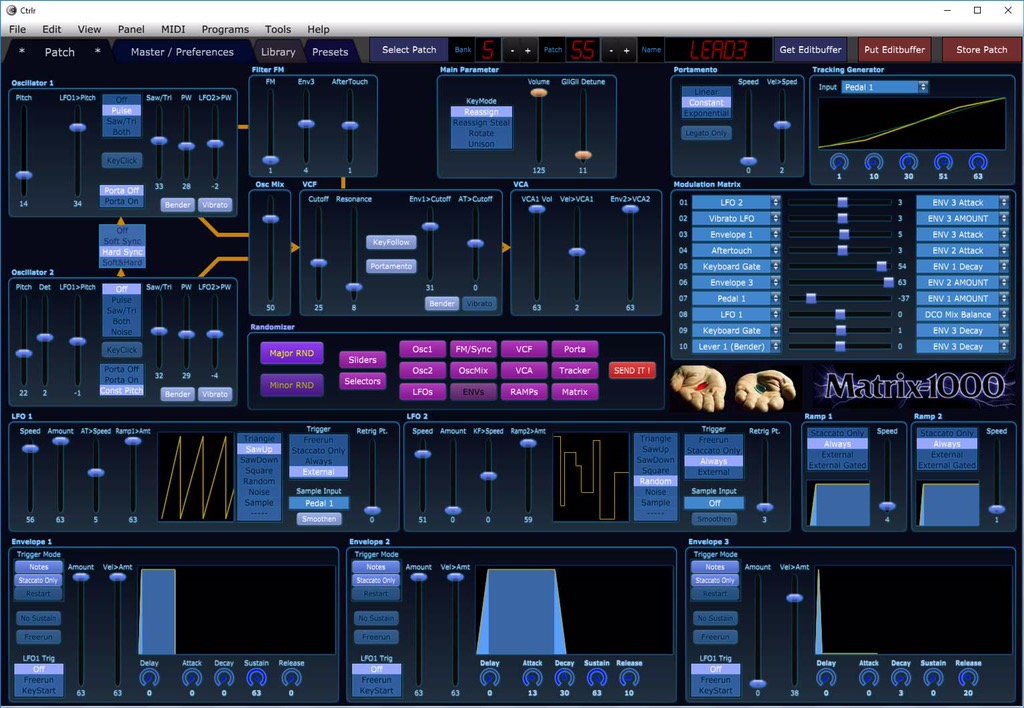
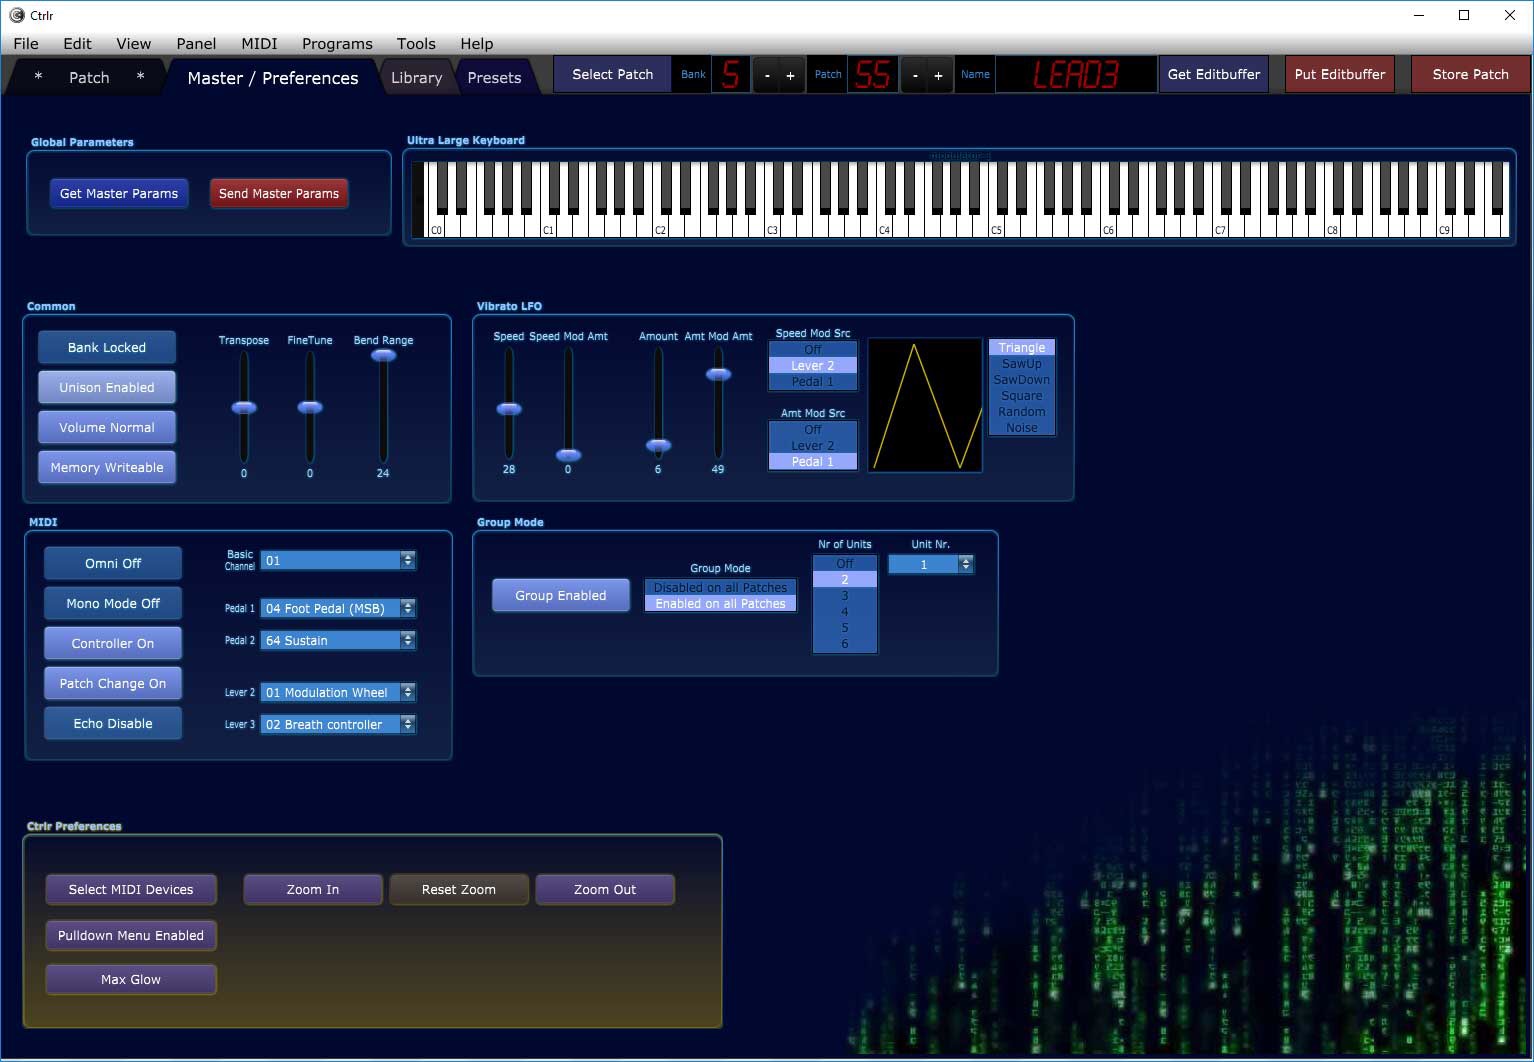
Granted, there is already a Matrix editor panel, but it’s been in permanent Beta, and Chris’s panel simply looks great, from the layout of the controls, via the Matrix-movie branding, to the randomizer (brought up by clicking on the red pill, of course!). So: stay tuned!
Über den WAF, den “Women’s Acceptance Factor”, habe ich mich schon öfter ausgelassen – eine Umschreibung für die unbestreitbare Tatsache, dass sich tolle Technik für normale Erwachsene nicht immer ganz so toll darstellt und anfühlt wie für den Normalnerd. Um so stolzer bin ich auf dieses leicht nerdige Geschenk:
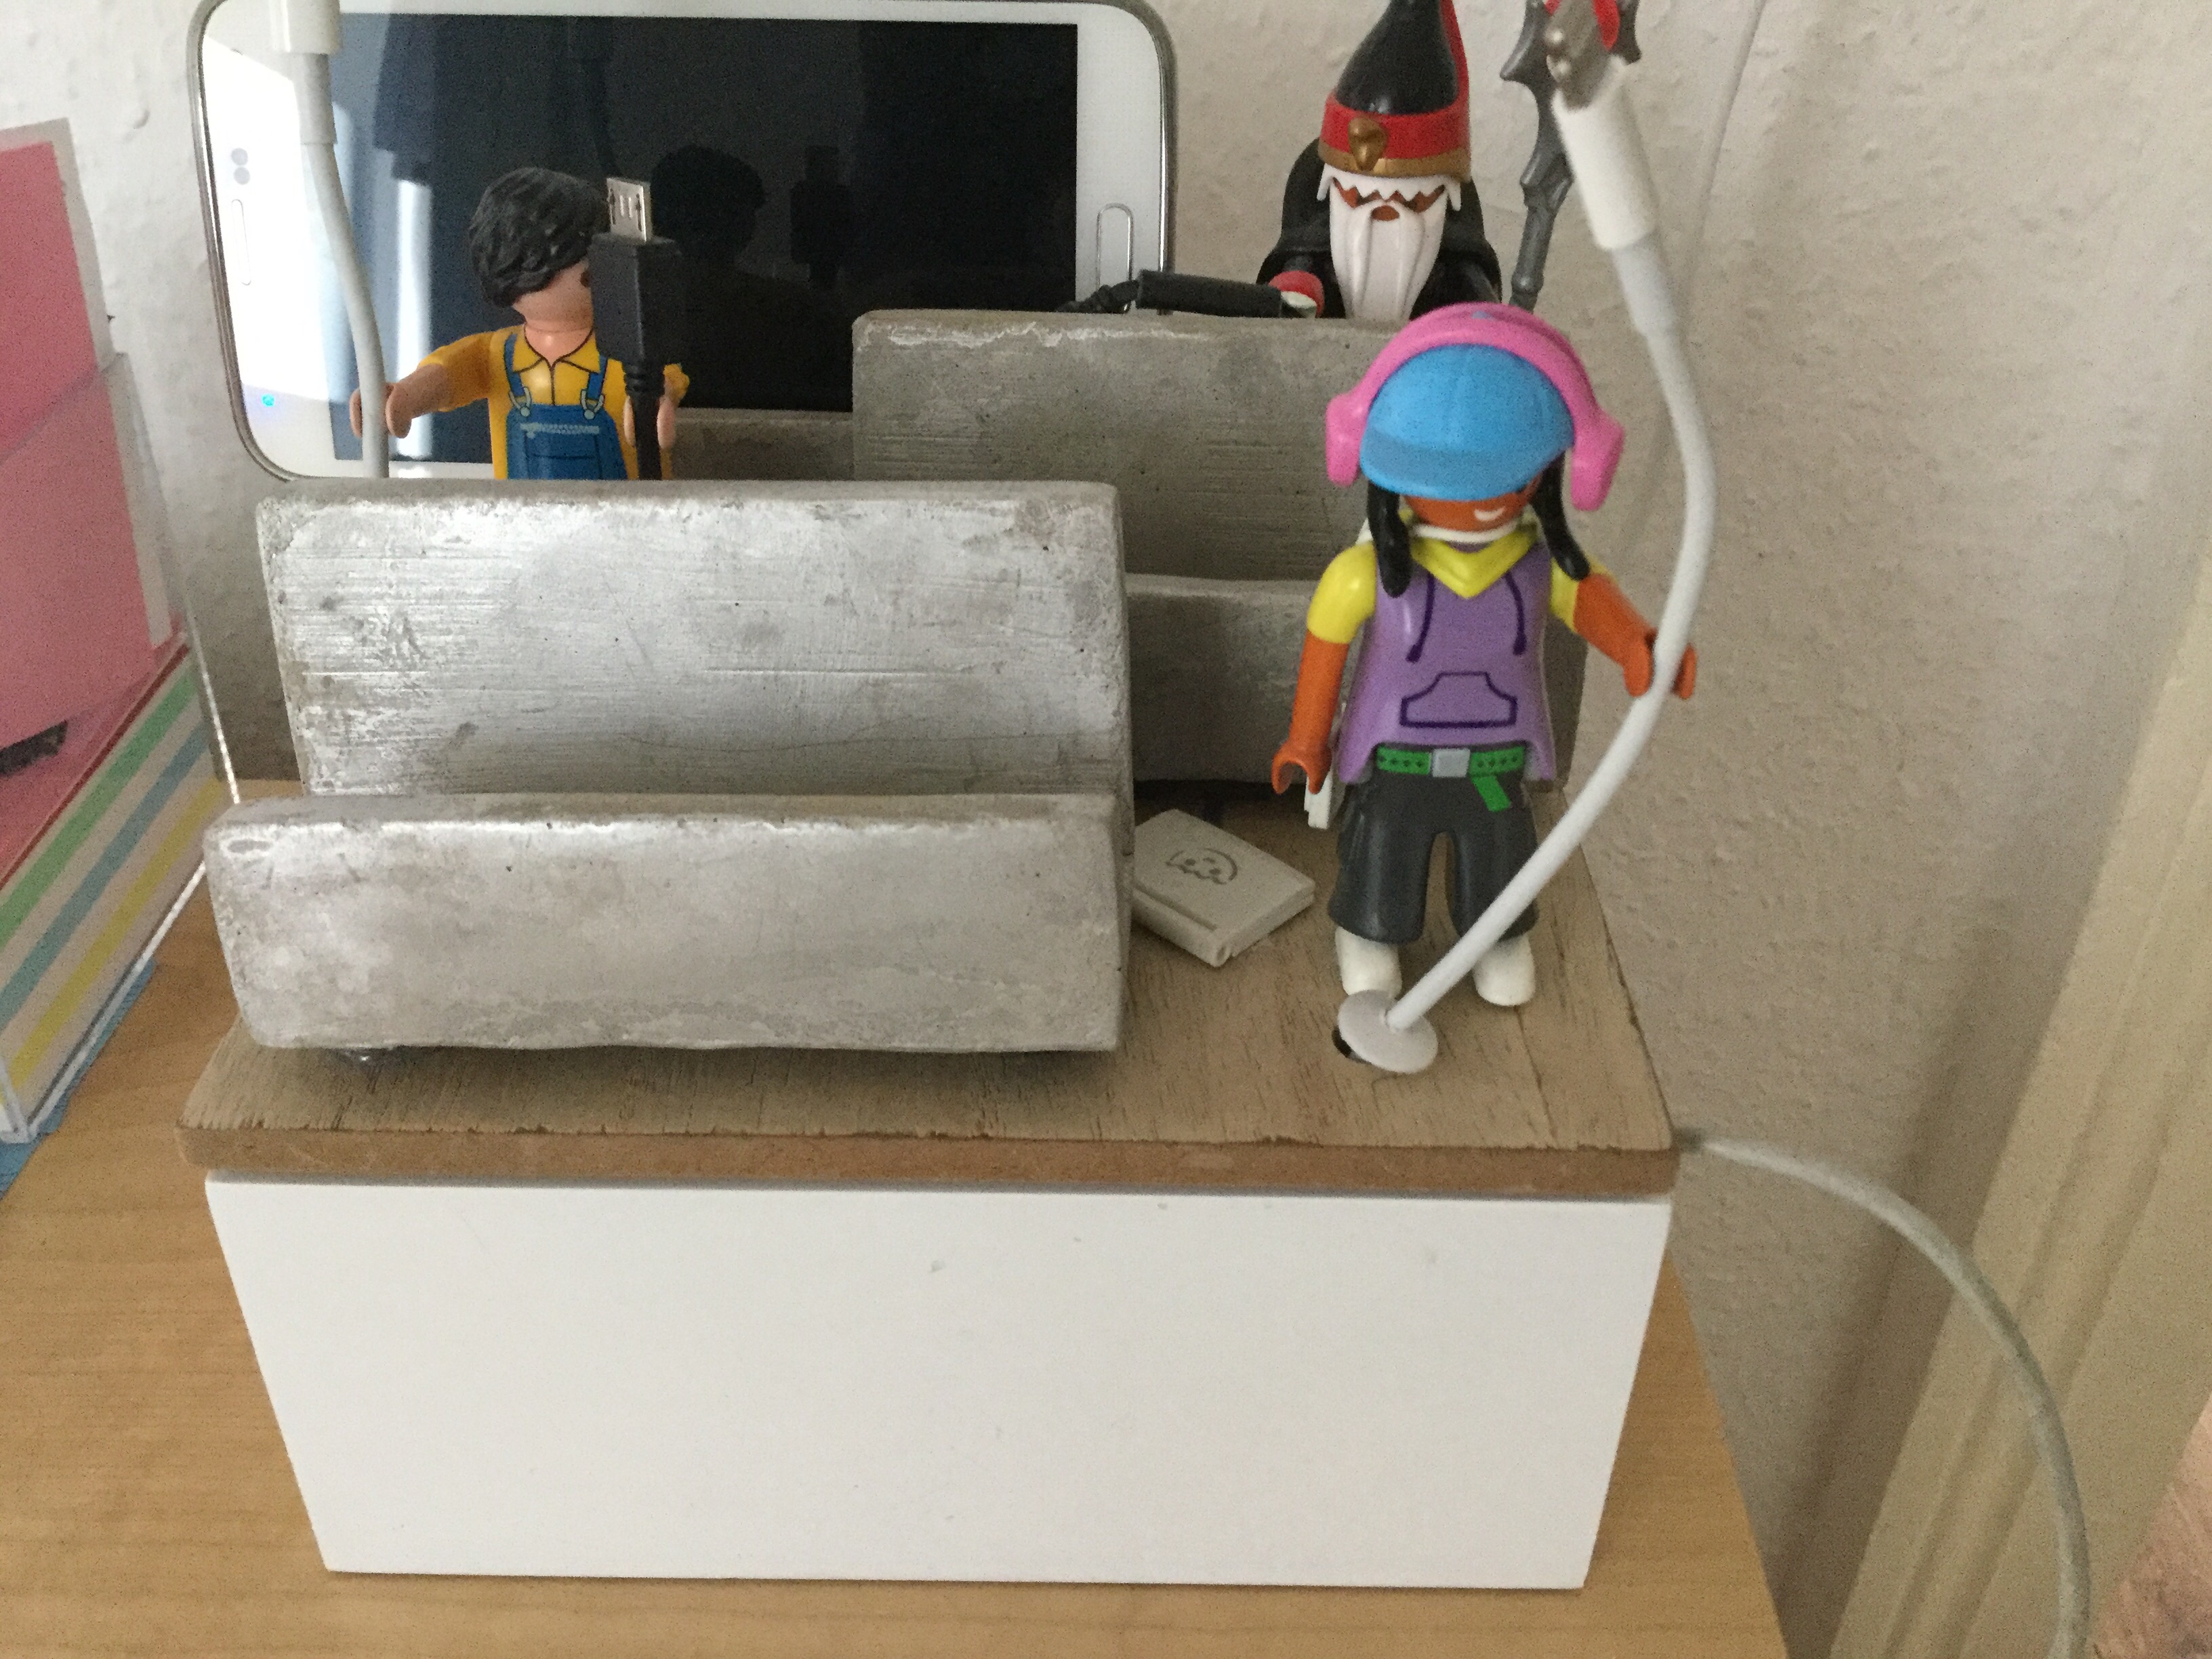
In diesem kleinen Kästchen befindet sich ein Ladegerät, das parallel zwei Android- und iOS-Geräte laden kann und dabei allen Kabelsalat vor den Bewohnern der Wohnung versteckt. (Das Kabel, das an der Seite herausragt, ist nur temporär eingesteckt, um noch einen alten iPod laden zu können.
Wahnsinn: Dieser Handwerker hat Android- UND iOS-Ladekabel dabei. Und muss nicht nochmal zurück in die Werkstatt, um den fehlenden Adapter zu holen.
Die Auswahl der Figuren ist ein wenig zufällig. Ursprünglich wollte ich mal eine gemischt geschlechtliche YMCA-Truppe zum Ladedienst antreten lassen, aber dann fand ich tatsächlich keinen Indianer und hatte die Polizistin verschlampt. Das schnell noch nachgekaufte Überraschungsfigurentütchen enthielt den Magier – passt ja auch ganz gut.
Die Micro-USB-Ladekabel habe ich mit einem Aufroller eingebaut, der ein ungenutztes Kabel wieder ins Kästchen zurückzieht, für die iOS-Kabel habe ich mir das gespart – die sind ohnehin anfällig genug. Die Bänkchen sind kleine gipserne Kärtchenhalter aus dem Dekoshop, mit Silberlack angesprüht. Wirkt römisch.
So sieht’s von innen aus:
Tatsächlich kam das Geschenk gut an und wird seit geraumer Zeit freudig genutzt. Kleiner Nachteil: Die Playmobil-Figuren ziehen die nicht ganz so erwachsenen Frauen in unserer Familie geradezu magisch an – deshalb ist der Laptop festgeklebt, und manchmal muss ich der Kleinsten den Kopfhörer für das City-Girl wieder abjagen.
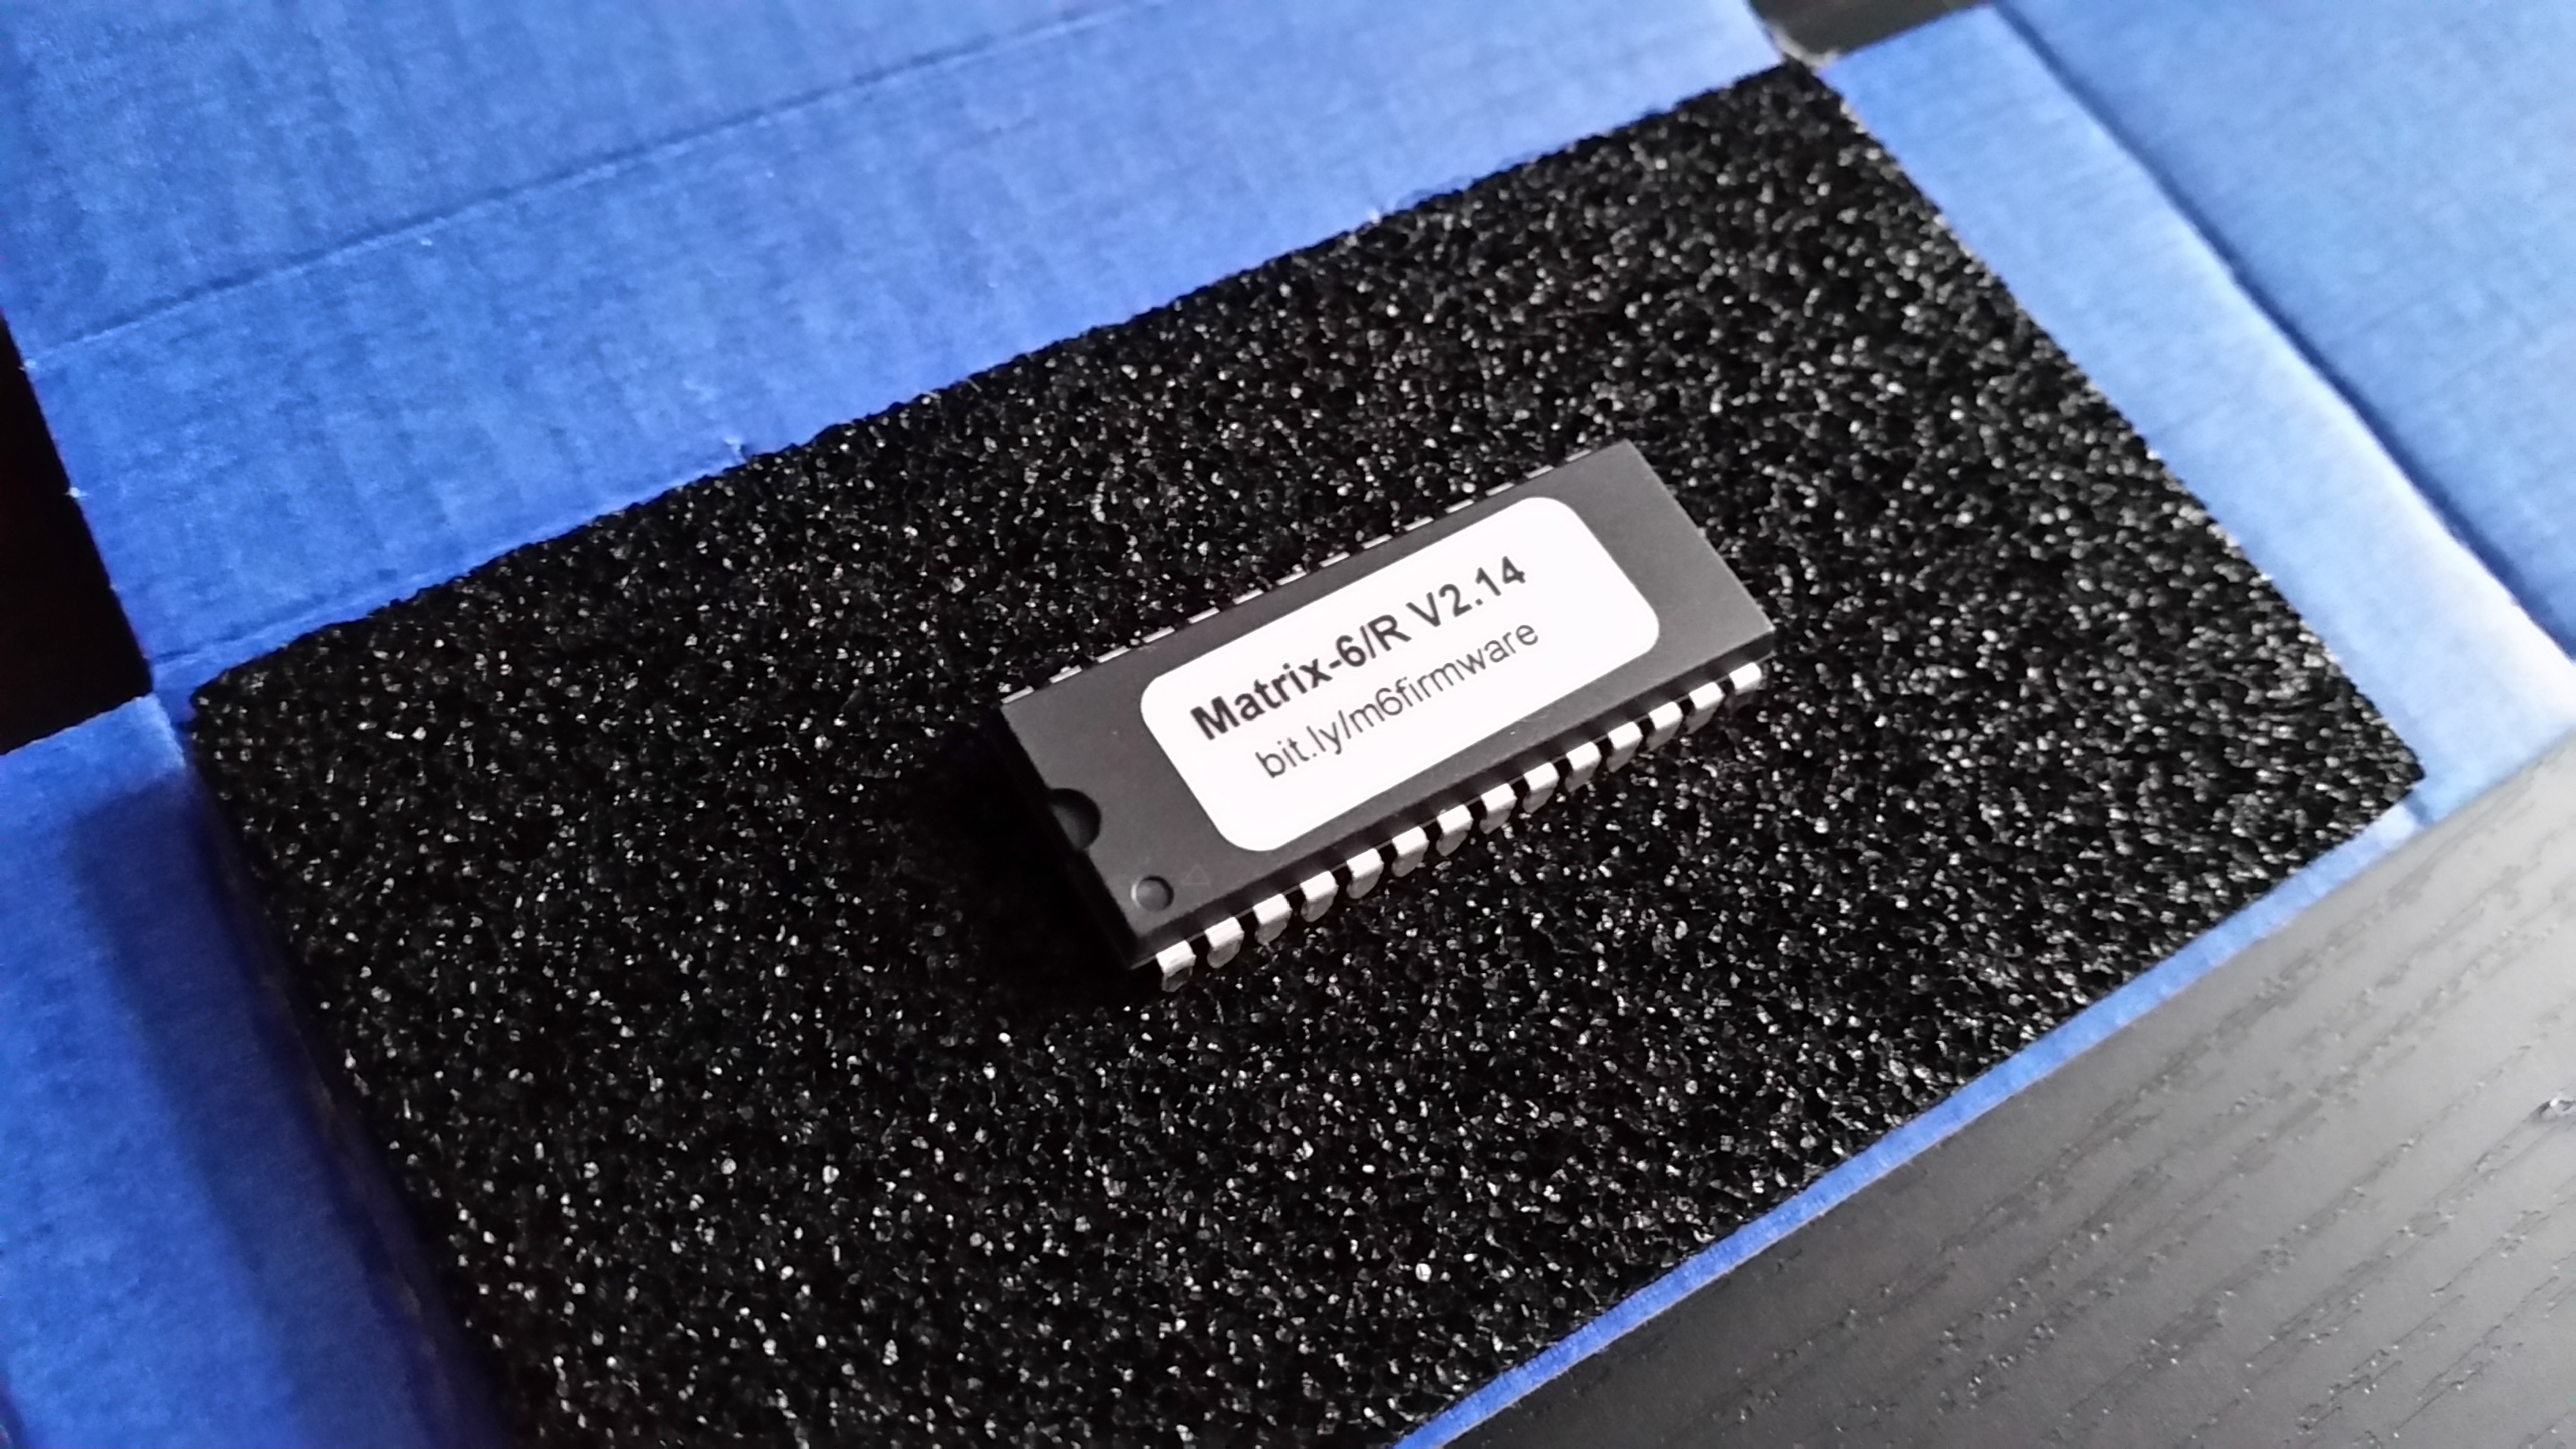
Bob Grieb’s brilliant firmware rewrite for the Matrix-6 and Matrix-1000 machines has been in testing for some time. The code seems to be running fine and is definitely a huge improvement: Matrix-6 owners will gain a machine that is much more responsive, and has been ridded of a couple of nasty bugs. And even for Matrix-1000 owners that have been using GliGli’s v1.16 patches, the new software offers, in my humble and slightly biased opinion, great advantages.
Bob has started shipping EPROM chips containing the new code to people who do not have an EPROMMER available, and I’ve agreed to doing the same thing over in Europe. The price for the update is €25 plus shipping,this contains a payment to Bob as a recognition of the endless hours he spent in analysing and rewriting the code.
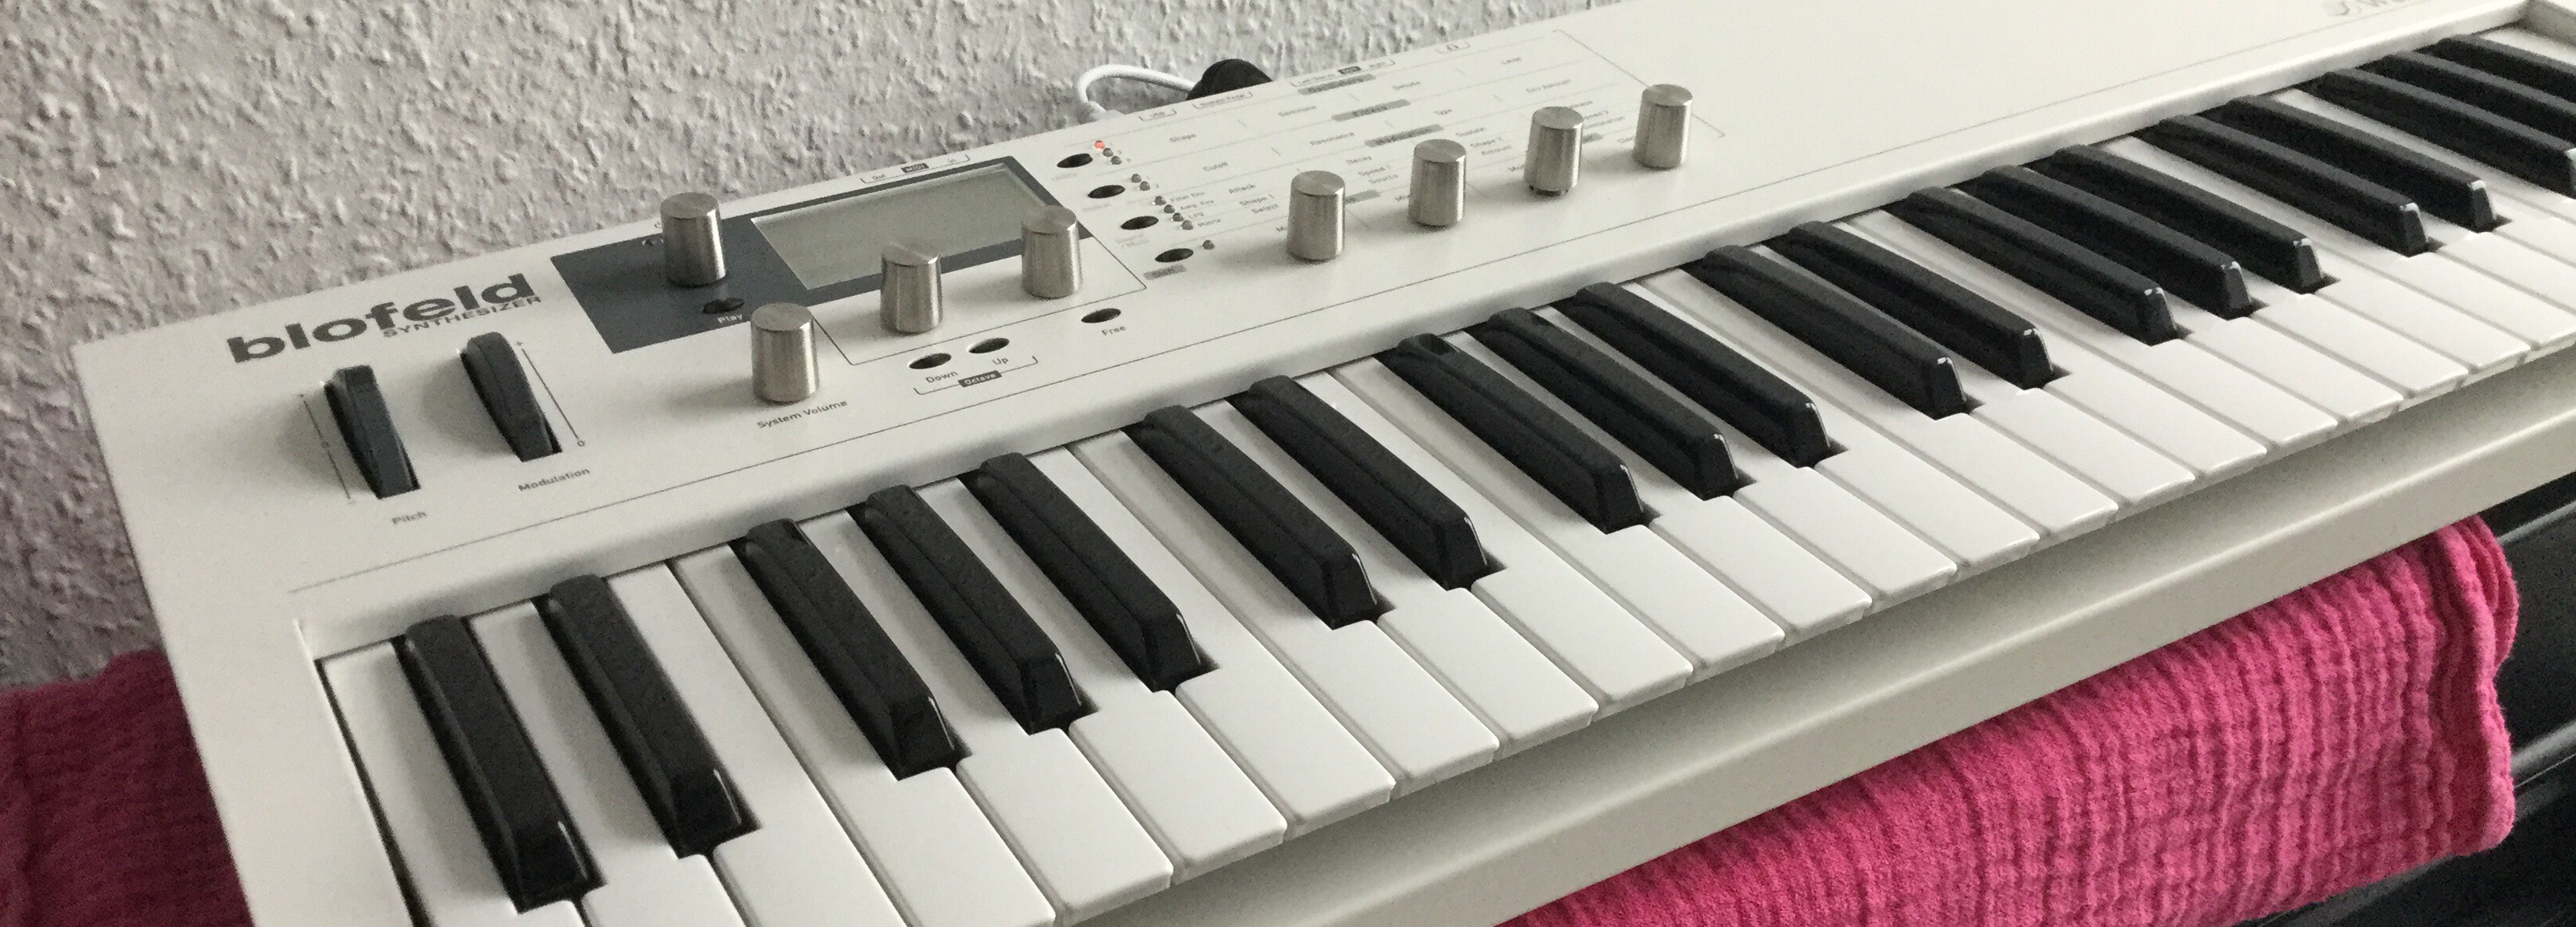
I like my white Blofeld. A very versatile VA synth with a good programming concept, and I am simply smitten with its look and feel. Solid metal, not too bulky or too heavy though, a big friendly graphics display, and a very good keyboard, with very good aftertouch sensibility. Got it really cheap, too.
As with the E-MU ESI32 that needed a new backlight, a steel casing means solid build quality – for the mechanical parts. BTW: To take it apart, you have to remove all the screws on the synth’s underbelly – 18 of them, casing screws as well as the ones holding the keyboard. No need to remove the wooden side panels or the rubber feet though. Then, remove all screws holding the electronics board – one of them is under the power switch so it is necessary to remove that switch from the housing by applying gentle pressure from the inside. In short, be warned: it’s a real pain in your lower backside to get the electronics dismounted, so if you do not have a good reason to remove Blofeld’s brain, just don’t.
Jumpy encoders being a very good reason, of course.
One thing that seems to plague the Blofeld, keyboard and desktop versions alike, is that the encoders are likely to behave eratically; they tend to become jumpy an unrealiable. Achim at stromeko.net, who has loads of insight into and experience with Waldorf synths and their tech, recommends soldering in buffer caps, but to make a long story short, I think you might be better off cleaning, lubricating, and bending rather than only soldering. I’d suggest addressing the mechanical problems first.
Jumpy? Greasy.
My Blofeld did indeed suffer misbehaving encoders. The two under the display were the worst, the ones that you use the most in tweaking sounds. This type of behaviour is not new to me; I fixed a Micro Q once, the Blofeld’s predecessor that had suffered from the same erratic encoder behaviour – after years of use. They still use the same kind of encoder – and these are easy to open and clean.
Once again, it proved that most problems in electronics are mechanical by nature – in my Blofeld, the encoders had been greased to ensure smooth operation, but a surplus of grease had seeped into the contacts. Update: Or so I thought – in fact it may be a special kind of grease to protect the contacts; you may use Kontakt-61 or a similar lubricant intended for contacts.
To fix the mechanical problems, carefully bend the pickup contacts on the rotor just the tinyiest bit higher to increase pressure After cleaning the encoder, and after re-applying the contact oil, encoder operation is now flawless.
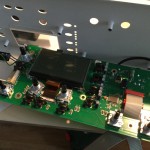
To get to the encoders, the buttons have to be removed. Just pull them off.
The Blofeld’s brain – that’s all there is: one tiny chip does all the work.
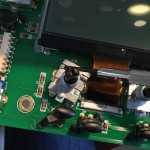
The encoder is held together by four metal tongues fixing the top part. Carefully wedge them away with a small flat screwdriver. Warning: the metal is easy to bend but will tear when bent repeatedly.
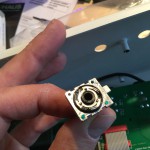
The top of the encoder, removed. This is the rotor. Clean carefully and, with even more care, readjust the feather contacts to compensate wear of older encoders.
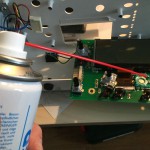
I am usually not too keen on chemical solvents like Kontakt spray, but it did good work as a degreaser here. Spray the solvent on a Q-tip rather than onto the encoder shaft – the grease is needed here.
A bit of degreaser applied to the base of the encoder. Clean and dry with a Q-tip, put the top part back, and bend the metal tongues back to hold it in place. Use a bit of force, or the encoder will tend to clatter.
The encoders are held together by four metal tongues from a very soft metal. It is very hard to bend it back into position so that it closes the encoder without play; a drop of hot glue holds the top in place and is easily removed if the encoder is due for maintenance again.
One final note: The main encoder left of the display is of a slightly different type where the metal tongues have to be straightened to pass through a hole in the top part of the housing. Extra care needed with that.
03-2020: Two important updates: There is a much simpler way to reset the memory in the Matrix – just hold the ENTER key while switching it on. You may have to repeat that a couple of times to get a stuck Matrix unstuck. And if you consider changing the battery yourself, you can find a step-by-step description with video here.
Well, to change the firmware, you have to open the Matrix and exchange the firmware EPROM for a new one, and doing that, I’ve noticed that this machine was still equipped with its original battery. By lucky chance, I am the proud owner of two Matrixes, and the battery in this one has been doing fine – what kind of super battery did they use in these days, has been in service ever since 1989, and still producing fine 3.0 Volts of power – but I decided to exchange it anyway for a new CR-2032.
As you might know, the battery in the Matrix-1000 is soldered in with most machines, as it was customary with most synths from these days. I guess they never thought that they were building for the anoraks of the future. No problem, I came across battery holders with the same 20.5mm raster used in the Matrix – so no need for drilling, just a simple solder-and-replace job. While soldering, I bridged the backup battery voltage with an external power supply, and I even thought of desoldering the GND terminal first – the rationale behind this being that soldering pens are earthed, so by soldering the positive terminal first you might short out the battery. (Actually bollocks, but I did it anyway.) So I saved my precious memory settings while soldering in the battery holder.
Only to slide in the new battery the wrong way round.
You might not have realised – well, I never do – but the pad connector of a CR2032 is actually the GND terminal, and the housing is Vcc. And is labeled with a clearly visible “+” sign. Well, I put the battery in the wrong way round anyway, thereby effectively losing all my patch and memory settings.
The battery in its new holder, now in the correct position: the plus terminal facing upwards
This is, of course, no big deal. I keep moving sound banks between my two Matrixes anyway, so I have pretty recent Sysex backups. Unfortunately, the unbuffered RAM chip lost just enough memory to put the machine into an undefined state – it would no longer boot beyond the init routine displaying the firmware version.
Switch off the the M-1000, disconnect it from mains, open it.
Disconnect the battery. Leave it disconnected.
Switch the M-1000 on, draining its buffer capacitors. Leave it for a couple of seconds – the completely powerless RAM should be all FF’s now.
Connect the M-1000 to mains, and switch it on. It should start now.
Do a calibration run, just to be sure. (Navigate to Ext. Funct., select 7, Enter, select 2, Enter.)
Reconnect the battery.
Done. Now you may switch off the Matrix, or supply it with fresh patch data.
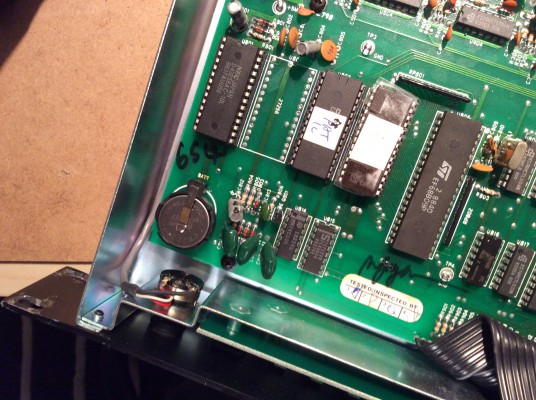
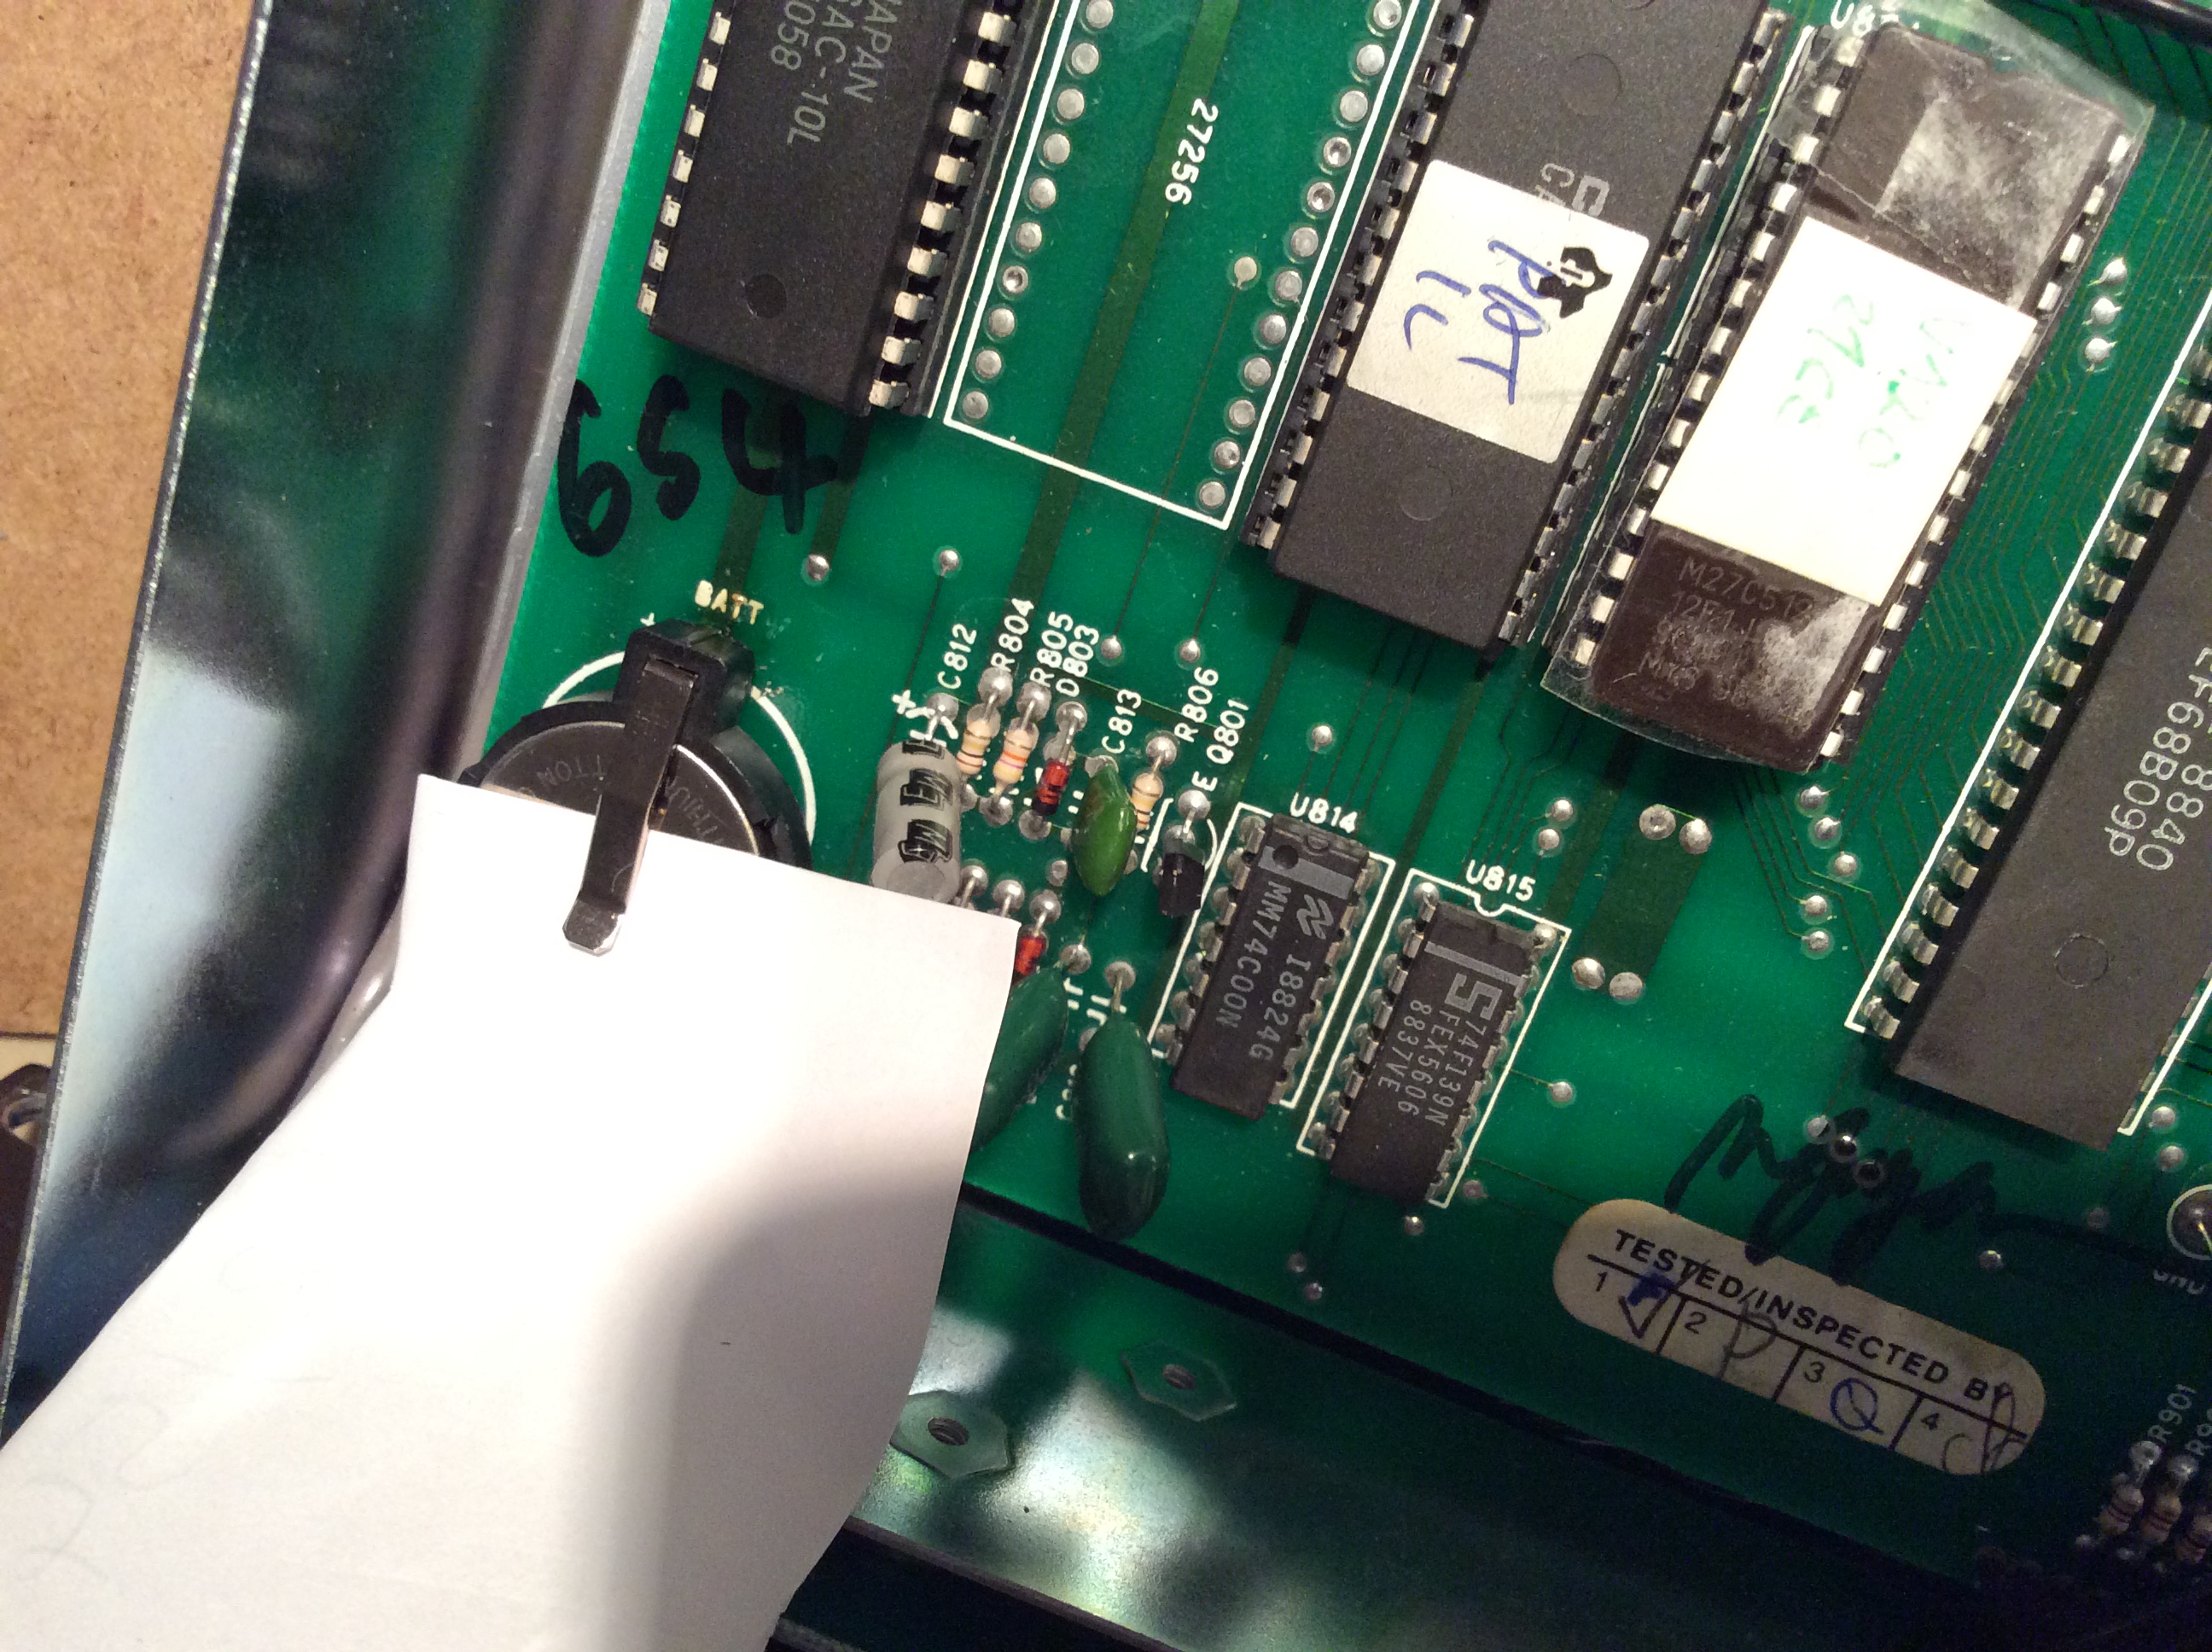
In case you may have wondered, there is a very simple and effective way to disconnect/reconnect the battery in a running machine: push a strip of paper between the battery and the battery holder’s terminal. Remove it to reconnect.
This website uses cookies to improve your experience. We'll assume you're ok with this, but you can opt-out if you wish.AcceptRead More
Privacy & Cookies Policy
Privacy Overview
This website uses cookies to improve your experience while you navigate through the website. Out of these, the cookies that are categorized as necessary are stored on your browser as they are essential for the working of basic functionalities of the website. We also use third-party cookies that help us analyze and understand how you use this website. These cookies will be stored in your browser only with your consent. You also have the option to opt-out of these cookies. But opting out of some of these cookies may affect your browsing experience.
Necessary cookies are absolutely essential for the website to function properly. This category only includes cookies that ensures basic functionalities and security features of the website. These cookies do not store any personal information.
Any cookies that may not be particularly necessary for the website to function and is used specifically to collect user personal data via analytics, ads, other embedded contents are termed as non-necessary cookies. It is mandatory to procure user consent prior to running these cookies on your website.