Es ist ein schönes Gefühl, Dinge reparieren und instand halten zu können. Der Technik nicht ausgeliefert zu sein. Funktion möglich zu machen.
Es ist ein nicht so schönes Gefühl, durch Blödheit oder Ungeschicklichkeit die eigenen Erfolge sabotiert zu haben. Und wo ich gerade am Aufarbeiten alter Schludrigkeiten bin, kann ich auch gleich das festhalten: Manchmal baut man, wenn man baut, Mist.
Fall 1: der Beamer.
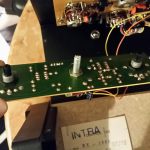
Bei eBay als defekt ersteigert, weil ich aufgrund der Fehlerbeschreibung die Vermutung hatte, da wäre noch was zu machen. Tatsächlich: Bald hatte ich heraus, dass der Projektor an sich völlig intakt war, aber unter einem schlecht montierten Gehäuseschalter litt – so ein Schalter, der beim Öffnen des Gehäuses die Stromzufuhr unterbrechen soll; er unterbrach sie auch gerne einfach so. Über meine Entdeckung war ich so euphorisch, dass ich unvorsichtig und ungeschickt geworden bin und mit dem Schraubenzieher im geöffneten Gerät einen Kurzschluss verursacht habe.
Drei Dinge passierten:
- Es knallte gewaltig.
- Die Sicherung flog raus und ich saß im Dunkeln.
- Vor Schreck riss ich meinen Arm zurück und dabei die Bedienplatine samt Stecker von der Platine.
Natürlich habe ich versucht, das wieder hinzubiegen bzw. zu -löten, aber ohne Erfolg. Tja, einige Sekunden lang hatte ich für praktisch überhaupt kein Geld einen eigenen Beamer.
Fall 2: die Büro-Kaffeemaschine.
Ach, meine gute, alte Saeco Vienna. Ein Sorgenkind von Anfang an, und dann: treu, brav, verlässlich. Bewährte Koffeinspenderin für einen guten Teil des Büros, und bei kleineren Wehwehchen mit etwas Liebe immer wieder zur Arbeit zu bewegen. Da sie das zwanzigste Lebensjahr schon hinter sich haben dürfte und sich zumindest in den letzten Jahren bestimmt nicht gelangweilt hat, ist das schon eine Lebensleistung. Und doch…
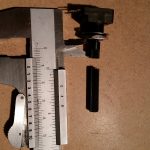
…plötzlich, nur noch Tröpfchen statt eines Kaffeestrahls. Wohl meinende Kollegen rissen laue Witze über Prostataprobleme bei älteren Herrschaften, kurz: es war wieder Zeit. Einen Sonntagnachmittag lang den Küchentisch blockiert, den Fehler gesucht und bald gefunden – wie beim allerersten Mal war es ein Krümel Kaffee, der den Durchflussmesser verstopfte. Schnell beseitigt und gleich noch an die Große Inspektion gemacht, also gereinigt, das Mahlwerk demontiert, Dichtungen ersetzt, zusammengebaut, ausprobiert, gemerkt, dass eine Dichtung fehlte, die Sauerei weggewischt, alles wieder aufgemacht, Dichtung umgesetzt, zusammengebaut, läuft. Super!
Also schnell aus der Wohnung schaffen, damit sie aus dem Weg ist.
Der Denkfehler wurde mir klar, als ich die Maschine am nächsten Morgen auf Arbeit aus dem Auto holte: Es ist kalt, auch in Frankfurt friert es nachts. Das Restwasser in der Maschine war auch gefroren. Und damit sind einige Dichtungen und Schläuche hinüber. Welche, das will ich schon gar nicht mehr erkunden – vermutlich die Boilerdichtung, für die man wirklich, wirklich alles auseinandernehmen muss.
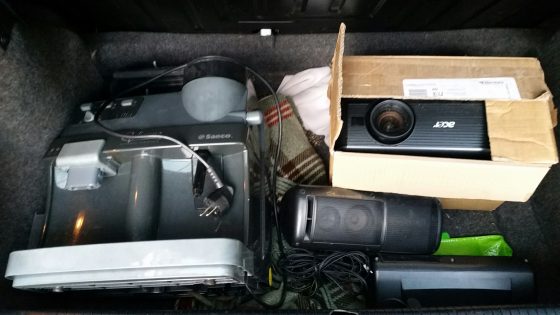
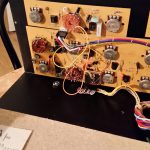
Links die erfrorene Kaffeemaschine, rechts der erschlagene Beamer. Und ein Paar alte Autoboxen
Das hier ist also nur noch eine Kofferraumladung Elektroschrott (genauer gesagt: ich habe beschlossen, dass es nur noch Elektroschrott ist), und geht demnächst zum Recyclinghof.
Aufgegeben? Ja.
Hätte ich die Reparaturkandidaten nicht noch einmal reparieren können? Vielleicht. Aber so wie mich der Beamer seit Monaten vorwurfsvoll anguckt, hätte mich auch die Kaffeemaschine vielleicht jahrelang angeguckt, bis ich irgendwann dann doch den Mut und die Zeit gefunden hätte, einen Tag für einen weiteren Reparaturversuch zu opfern. Nenn mich schwach: Ich habe das nicht mehr ausgehalten.
Ärzte, sagt man, können ihre Fehler auf dem Friedhof besuchen. Ich habe meinen zumindest hier im Blog ein kleines Denkmal gesetzt.