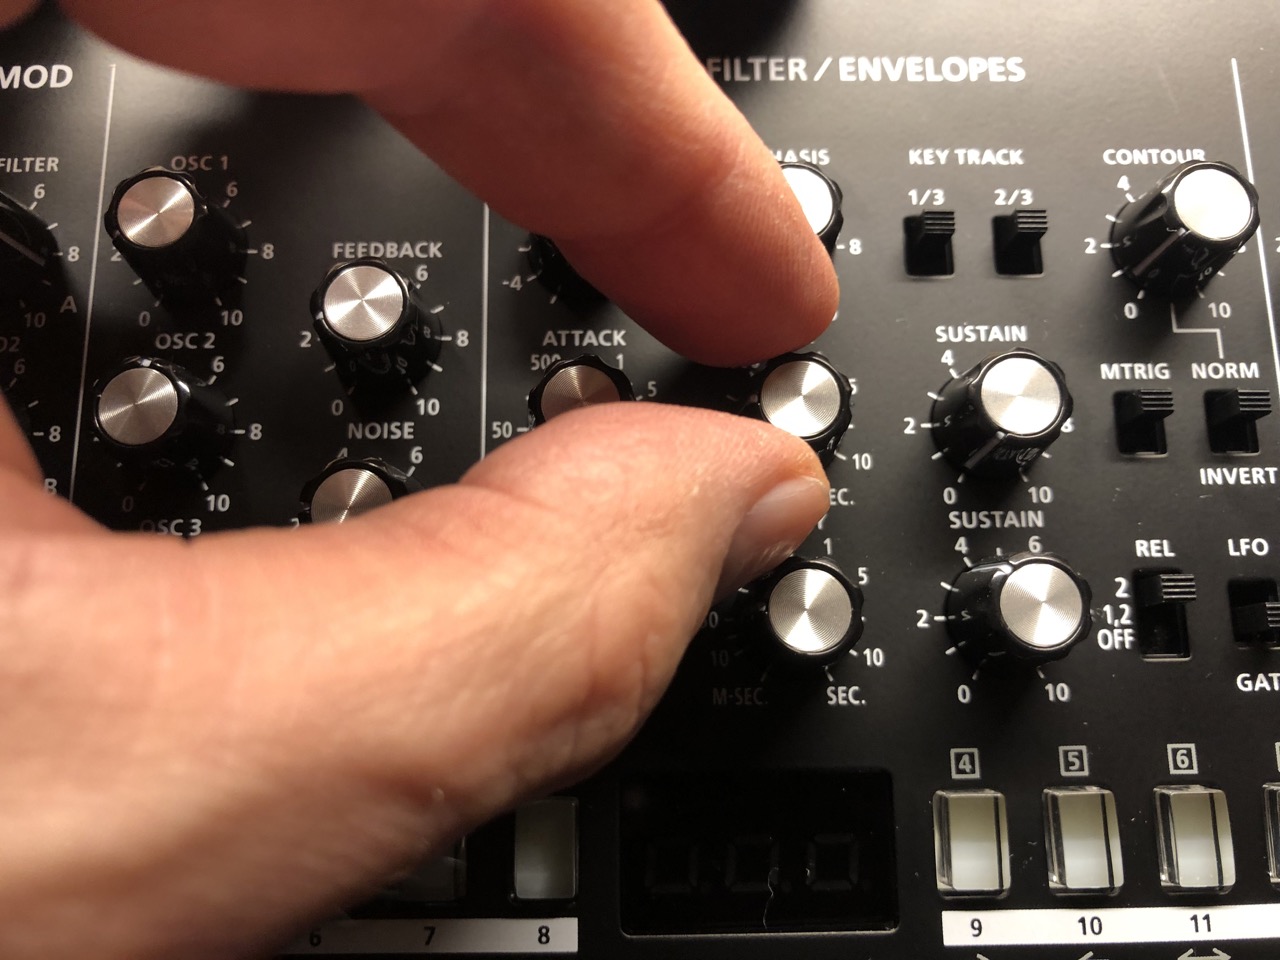
Isn’t it GORGEOUS? Classic Minimoog – less of a control panel, more of an erogenous zone for synth nerds. Tell me you don’t want to feel up these knobs! The pure beauty of a one-of-a-kind electronic instrument. The design and the sounds are still in highest demand more than 50 years after its design – and I was pretty sure I’d never, never even be tempted to buy one.
I never even wanted a Minimoog!
Let’s be honest: Moogs are ludicrously overpriced, and overhyped. Not a single classic Moog ladder filter sound you couldn’t do just as well with a modern plugin, or almost any modern hardware. Hey, even the R3 – my most underdog synth – can do pretty decent Moog impressions. And if you are with the “Digital-will-never-sound-like-true-analog” esoterics, there is still the option of Neo Old School: Using the old design with the upsides of modern analog technology. Get yourself a Boog, for fuck’s sake. (And a life.)
Still… as we know, it’s all about the workflow – and about that unique combination of how an instrument looks, feels, and sounds. So when I saw a Moog enclosure and front panel on eBay for a couple of Euros, I could not resist and had to buy it.
“It’s aliiiiive!” – How to give life to an empty corpus
I consider not one option, but two:
Option A: “Midimoog” with modernized clone Roland SE-02
Roland’s SE-02 mini synth expander differs from its Boutique line siblings in that it contains analog circuitry, not a digital emulation of it. It has evolved from the classic Minimoog formula, offering a couple of great updates: A cross-modulation section, additional dedicated LFOs, a nice digital delay, a sequencer, and the ability to recall and store presets. But the fiddly knobs make it – to quote one of Youtube’s great wise men – one of “the world’s most hated audio tools.”
Kind of a no-brainer: Take the beautiful engine, free it from its housing constraints, and put it into the Minimoog enclosure. In theory, this should mean no more than having to patch the Moog panel’s pots into the SE-02 board, and place some additional knobs and keys to have access to the added functionality.
This, of course, would bring the Roland’s resale value to nil, so it would probably be wiser to design the “Midimoog” as just that: a MIDI controller for the SE-02. Which is much more work, of course. See Option B.
Option B: “Dino Board” polyphonic digital emulation
There has been a really decent Minimoog clone based on a meticulous digital emulation: The Creamware/SonicCore Minimax which has been in the market since 2005. 2005, damn it! The year the Airbus A380 first took off, and two years before the Blofeld did. Remember how you tried to protest when I claimed that producing authentic Moog sounds was no big deal? Sadly, the Creamware/SonicCore Authentic Sound Board synths – honorable mention: the Prophet clone – are no longer in production. As they are as rare as they are beautiful, they fetch prices that would make Bob Moog proud.
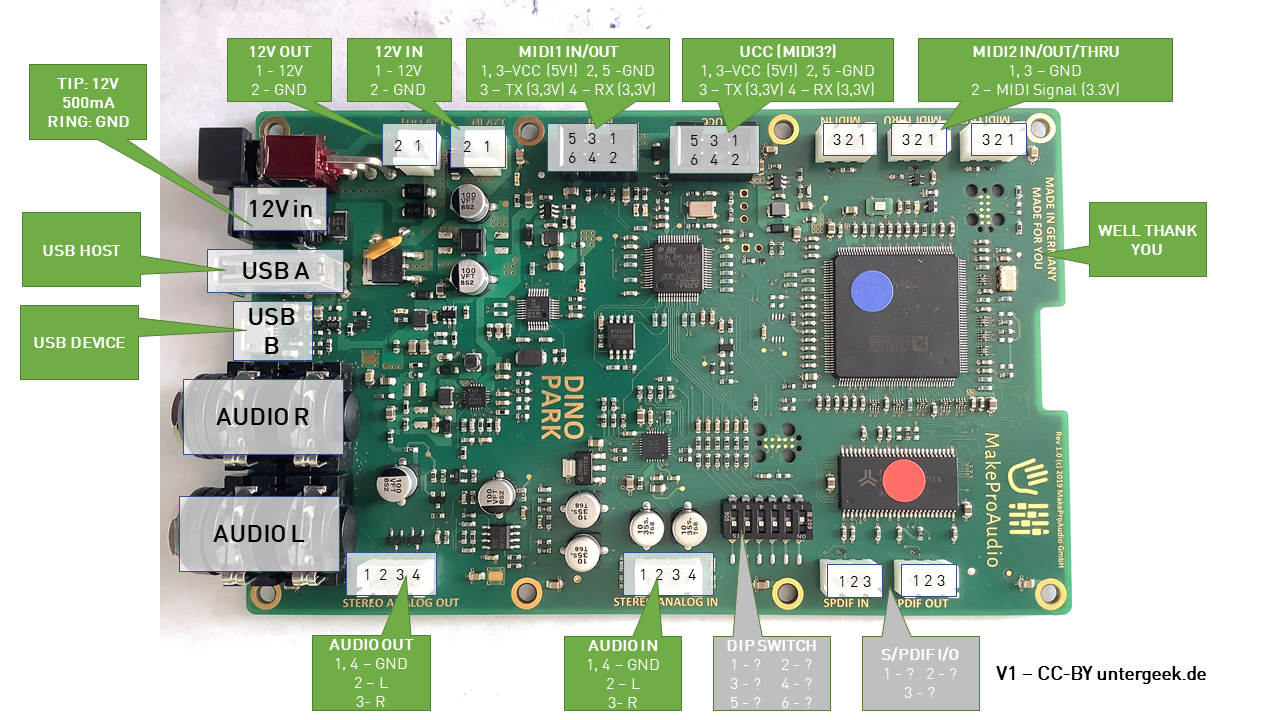
2019, the DinoPark synth board came out, heir to the Creamware/SonicCore technology and sound. There is allegedly a sad story behind this, a split between Creamware’s founders, one of them leaving the company and trying to cash in on the development; suffice it to say that the DinoPark is a remix of the Use Audio Plugiator, which was a re-packaged remix of Creamware’s Minimax, Pro12, and Prodyssey designs. Although the technology has advanced considerably, the emulations haven’t: Still the same amout of voices with the same set of features as more than a decade ago.
Packaging that thing with a touchscreen UI was fun, but to be honest, I almost never used it. So the board could just as well power a proper Minimoog clone. Well, it’s digital, but it sticks pretty close to the original Moog design, with a few reasonable enhancements (simple but usable FX, velocity and aftertouch modulation, restoring and storing sounds.) And it’s 12-voice polyphonic!
The downside is that I can’t just go ahead and solder a couple of pots to it. I’d have to design and program a MIDI controller – scanning the potentiometers, knobs, and keys, and generating MIDI control signals from it.
So what am I going to do?
Tell you what: I’ll try to do both.
(Really looking forward to doing a blind test of analog vs digital Moog clone hehehe lol)
First steps into the limbo
I have been warned: The very fact that I could buy that panel, because the maker gave up, shows me that it is easy to start that kind of project but hard to finish it. (And do I know.) But as Lao Tse said: “A journey of a thousand miles begins with a single step.” (Fancy way of saying: There’s only one way to eat an elephant – bite by bite.)
My first step has been getting back into PCB design, and making a small MUX/DEMUX board based on the trusted CD4051 analog multiplexer chip to read the pot’s values into a mini computer with only one analog input.

I’ll keep that for another post, though – Designed it, routed it, ordered it; waiting for the results to come back from the fab. And I am pretty sure Jenny will love it too – once I have this kind of generic analog controller circuitry running, the Jenny Midification project will hopefully move on.