WeiterlesenThis is the first post in a series of small projects for retrofitting my JEN SX-1000 monosynth with a simple and cheap MIDI interface controller. Read about the basic idea here. Today, I am designing and building the micro-controller brain of the Jenny retrofit – if you are capable of basic soldering, it should not take you more than two hours and a couple of very common electronic parts.
Schlagwort-Archive: Synthesizer
Caveat
Nachdem ich gerade billigen und schnellen Erfolg beim Bau eines eigenen MIDI-Controllers hatte und deshalb ersthaft darüber nachdenke, ein größeres Analogsynth-MIDIfizierungs-Projekt mit Jenny anzugehen: eine kleine Erinnerung.
Wie sagt doch ein guter Freund immer:
„Das Schlimmste, was uns passieren kann, ist, dass wir Erfolg haben.“
What the digital Prophet missed – iPad control for the Creamware Pro-12 ASB
Wouldn’t it be nice if you had a controller for every aspect of this thing?

A brilliant virtual-analog recreation of Sequential Circuit’s Prophet-5 – unfortunately, some important parameters can not be reached from the hardware.
A new glide pot for Jenny
A bit of TLC for my oldest synthesizer: Jenny is getting a new potentiometer. As the synth’s pots were rather cheap, open types that gather dust, and are 40 years old now, they have become all scratchy and jumpy. As I have mentioned before, I am not the greatest fan of Kontakt spray and similar solvents/cleaners, so I bought replacements. But I never found the time to actually replace them.
This knob is a good place to start: The „glide“ potentiometer is in charge of portamento, and it is one of the first things that might make Jenny fail (see Neil Johnson’s site). A faulty glide pot means that the synth will only ever play the same note regardless of which key you press. So I did replace that pot, which is pretty straightforward – you’ll find some pictures in this gallery. (It is a 2.2M linear type BTW.)
- The Glide pot is in the upper left corner of this picture. As you can see it is sitting on a small PCB together with the Noise switch and pot. Remove the knobs and the nuts from the axes of all three, and you can take out the board to replace the potentiometer.
- The pot needs to have a 10mm shaft and a 5mm diameter axis. Cut off the axis at about 10mm – which makes the distance from the end of the shaft to the top of the pot 20mm.
- Pot soldered and screwed to the PCB. Ready to re-insert and re-attach the board into Jenny’s panel.
Overview of potentiometer values
This is an overview of the potentiometer values, some of them are linear, some logarithmic, a few antilog. The most obvious candidates for replacement, apart from the glide pot, would be Frequency (100k) and Resonance (100k) for the filter, and Tune (10k).
Fixing a Waldorf Blofeld’s jumpy encoders
Update, 25-Jan-2017: Post has been updated to reflect my recent insight that the „self-lubricating“ encoders in the Blofeld use a contact oil which should be replaced to avoid abrasion and wear. My sincerest apologies!
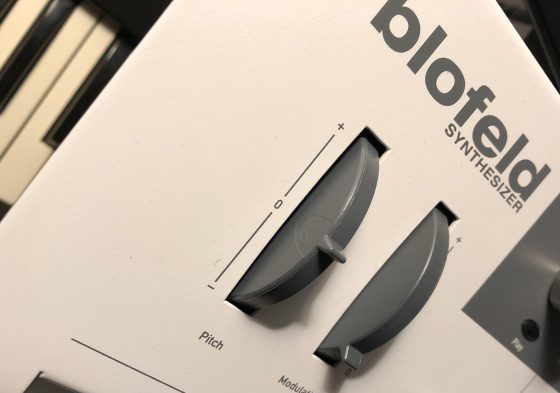
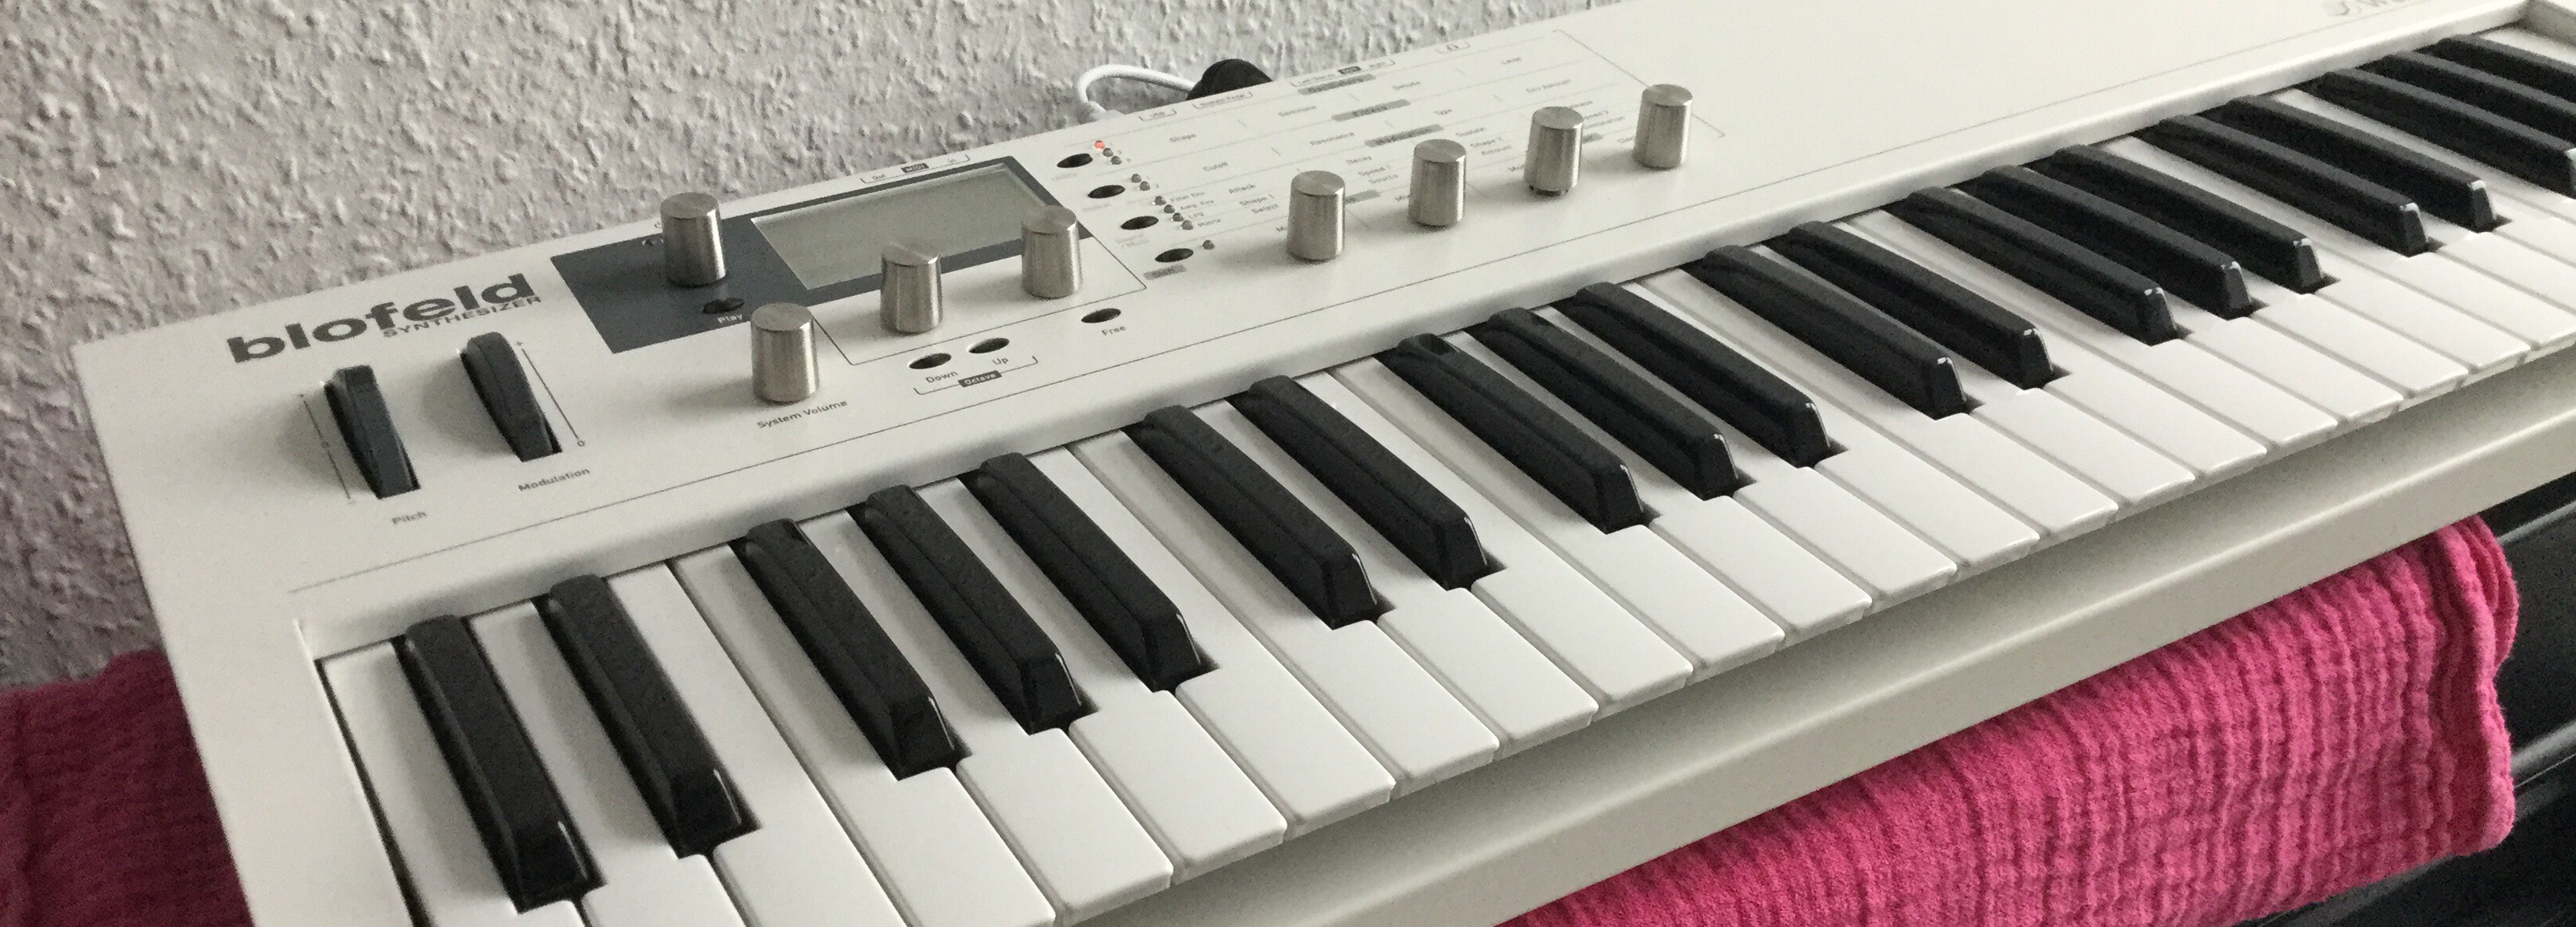
I like my white Blofeld. A very versatile VA synth with a good programming concept, and I am simply smitten with its look and feel. Solid metal, not too bulky or too heavy though, a big friendly graphics display, and a very good keyboard, with very good aftertouch sensibility. Got it really cheap, too.
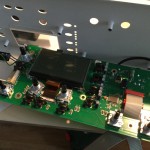
As with the E-MU ESI32 that needed a new backlight, a steel casing means solid build quality – for the mechanical parts. BTW: To take it apart, you have to remove all the screws on the synth’s underbelly – 18 of them, casing screws as well as the ones holding the keyboard. No need to remove the wooden side panels or the rubber feet though. Then, remove all screws holding the electronics board – one of them is under the power switch so it is necessary to remove that switch from the housing by applying gentle pressure from the inside. In short, be warned: it’s a real pain in your lower backside to get the electronics dismounted, so if you do not have a good reason to remove Blofeld’s brain, just don’t.
Jumpy encoders being a very good reason, of course.
One thing that seems to plague the Blofeld, keyboard and desktop versions alike, is that the encoders are likely to behave eratically; they tend to become jumpy an unrealiable. Achim at stromeko.net, who has loads of insight into and experience with Waldorf synths and their tech, recommends soldering in buffer caps, but to make a long story short, I think you might be better off cleaning, lubricating, and bending rather than only soldering. I’d suggest addressing the mechanical problems first.
Jumpy? Greasy.
My Blofeld did indeed suffer misbehaving encoders. The two under the display were the worst, the ones that you use the most in tweaking sounds. This type of behaviour is not new to me; I fixed a Micro Q once, the Blofeld’s predecessor that had suffered from the same erratic encoder behaviour – after years of use. They still use the same kind of encoder – and these are easy to open and clean.
Once again, it proved that most problems in electronics are mechanical by nature – in my Blofeld, the encoders had been greased to ensure smooth operation, but a surplus of grease had seeped into the contacts. Update: Or so I thought – in fact it may be a special kind of grease to protect the contacts; you may use Kontakt-61 or a similar lubricant intended for contacts.
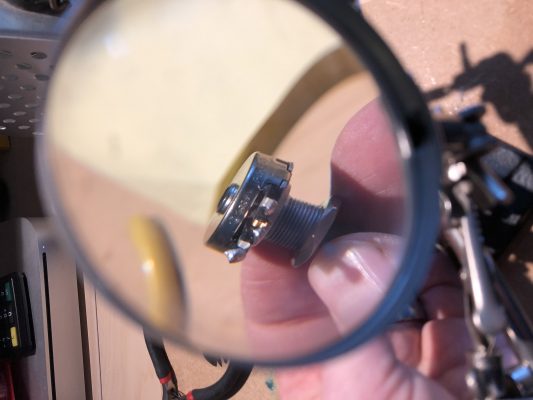
To fix the mechanical problems, carefully bend the pickup contacts on the rotor just the tinyiest bit higher to increase pressure After cleaning the encoder, and after re-applying the contact oil, encoder operation is now flawless.
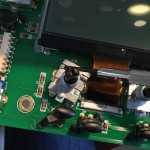
- To get to the encoders, the buttons have to be removed. Just pull them off.
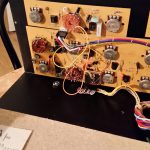
- The Blofeld’s brain – that’s all there is: one tiny chip does all the work.
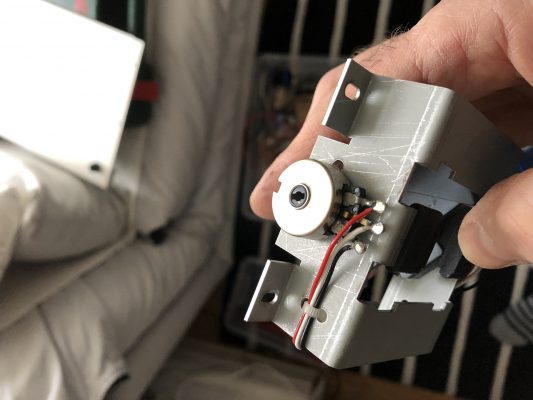
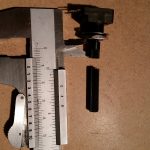
- The encoder is held together by four metal tongues fixing the top part. Carefully wedge them away with a small flat screwdriver. Warning: the metal is easy to bend but will tear when bent repeatedly.
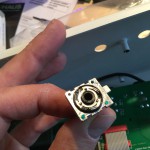
- The top of the encoder, removed. This is the rotor. Clean carefully and, with even more care, readjust the feather contacts to compensate wear of older encoders.
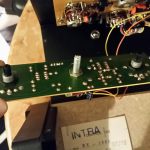
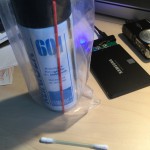
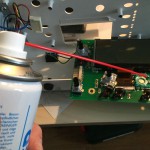
- I am usually not too keen on chemical solvents like Kontakt spray, but it did good work as a degreaser here. Spray the solvent on a Q-tip rather than onto the encoder shaft – the grease is needed here.
- A bit of degreaser applied to the base of the encoder. Clean and dry with a Q-tip, put the top part back, and bend the metal tongues back to hold it in place. Use a bit of force, or the encoder will tend to clatter.
The encoders are held together by four metal tongues from a very soft metal. It is very hard to bend it back into position so that it closes the encoder without play; a drop of hot glue holds the top in place and is easily removed if the encoder is due for maintenance again.
One final note: The main encoder left of the display is of a slightly different type where the metal tongues have to be straightened to pass through a hole in the top part of the housing. Extra care needed with that.
Dead Novations Society
No, that Bass Station you are trying to play isn’t dead. It’s just gone… to an undefined state.
I had a Novation Bass Station that did not produce a single sound. Although I could confirm that MIDI was still working – the device was sending Key ON/OFF and CC messages – and the LFO LED was blinking and responded to parameter changes, the synth was mute. And some research on Ebay and on the net confirmed that there are lots of Bass Station owners with the very same problem.
Weiterlesen
Securing Jenny’s power supply
Pretty straightforward, this one: Replace the JEN SX-1000’s fixed power cable with an IEC socket. (Like weird German words? You’ll love this: In German, this thing is called a „Kaltgerätestecker“, more precisely, a „Kaltgeräte-Steckverbinderbuchse“, which translates to „Cold unit connector socket“. Don’t ask me.)
No problems here apart from cutting a hole for the socket; I used steel drills to mark the corners of the cutout and then cut the steel with my Dremel tool. Lots of metal dust but fast, and it did the job precisely.
A word on Jenny’s power supply: It’s extremely oldschool – a transformer and a diode bridge generating +/-18VDC, two 7812 regulators generating +12V and -12V, and another 7805 regulator generating the +5V supply rail from the 12V. If you would like your JEN to be a bit more eco-friendly I’d advise replacing those regulators by the 2931CT low-dropout type, but apart from that, there’s hardly any reason to look at the power supply – it’s rather solid and possibly not your primary concern if the synth does not work.
„Dommschwätzer.“ (*)
Jaaaa…. kann. man. so. machen.
Trying to reattach a synth keyboard contact mat after cleaning? Quick tip: Use a needle. pic.twitter.com/tpdbPKpErI
— Untergeek (@untergeekDE) 28. Februar 2015
(*) Ich mag diese Szene: Heinz Becker bedankt sich bei einem hilfsbereiten Baumarkt-Mitarbeiter für den guten Tipp, die gekauften Latten doch zersägen zu lassen, bevor er sie ins Auto packt.
When exactly did analog synths become cool again?
Have a look at this picture.
Do you like what you see? Of course you do.
Analog is cool. Prices for analog gear are consistently going up. Just when processing power, sophisticated audio algorithms and smooth user interfaces have become ubiquitous, manufacturers have started developing and selling new analog synth hardware. Yes, I know: Analog sounds different, you say. Tell you what: I don’t believe it. Reminds me of those types who swore that golden CDs sounded better than the silver ones. It’s not the sound. Like I said: Analog is cool.
Just about thirty years ago, analog became uncool. Yamaha’s digital DX7 synth proved that digital was cheaper, more reliable, and more versatile than the old technology. Analog became harder and harder to sell, even in the discount variety that came without all the expensive knobs and switches, and one by one, the former giants went out of business: ARP. EMS. Oberheim. Moog. The whole Italian synth industry. Poof.
When did analog become fashionable again? The simple JEN synthesizer I am fixing and upgrading may provide an answer to this question. To be honest, there is quite a lot not to like about this machine. Single oscillator: tends to sound thin. Simple filter design: lacking bass punch and proper key tracking. Only one LFO with only one waveform (triangle). Portamento but no legato. Not to mention the no-brainers of modern (ie 1980s ff.) technology: preset memory, MIDI and USB interface, stable tuning.
On Sonicstate.com, there is a review page for the Jen SX-1000. Users may rate their synth from 0 to 5 points, 5 being the top rating. Taking these reviews, you can see the gradual change from fairly mixed reviews to an unanimously positive opinion.
Granted, there is a systematic bias: why should anybody who didn’t like analogs to begin with acquire and rate a Jen? Still, this graph shows one thing to me: The point where analogs became cool again was somewhere around 2001 to 2002.
Now we know when. If you’ve got the patience, let me argue why.
Tough Love: 5 Gründe, warum wir Retro lieben
Neulich habe ich mir einen 30 Jahre alten Synthesizer gekauft. Eine Maschine, die auch ohne die Kratzer nicht besonders hübsch wäre und längst von Software für ein paar Euro rechts überholt wird. Eigentlich wollte ich sie nicht einmal, und Platz und Zeit habe ich auch nicht dafür. Aber was willst du tun, wenn es Liebe ist. Liebe? Moment mal…
Crosspost zum Super-Retro-WMFRA #67 am 8.12. – weiter lesen auf wmfra.de.