Wouldn’t it be nice if you had a controller for every aspect of this thing?
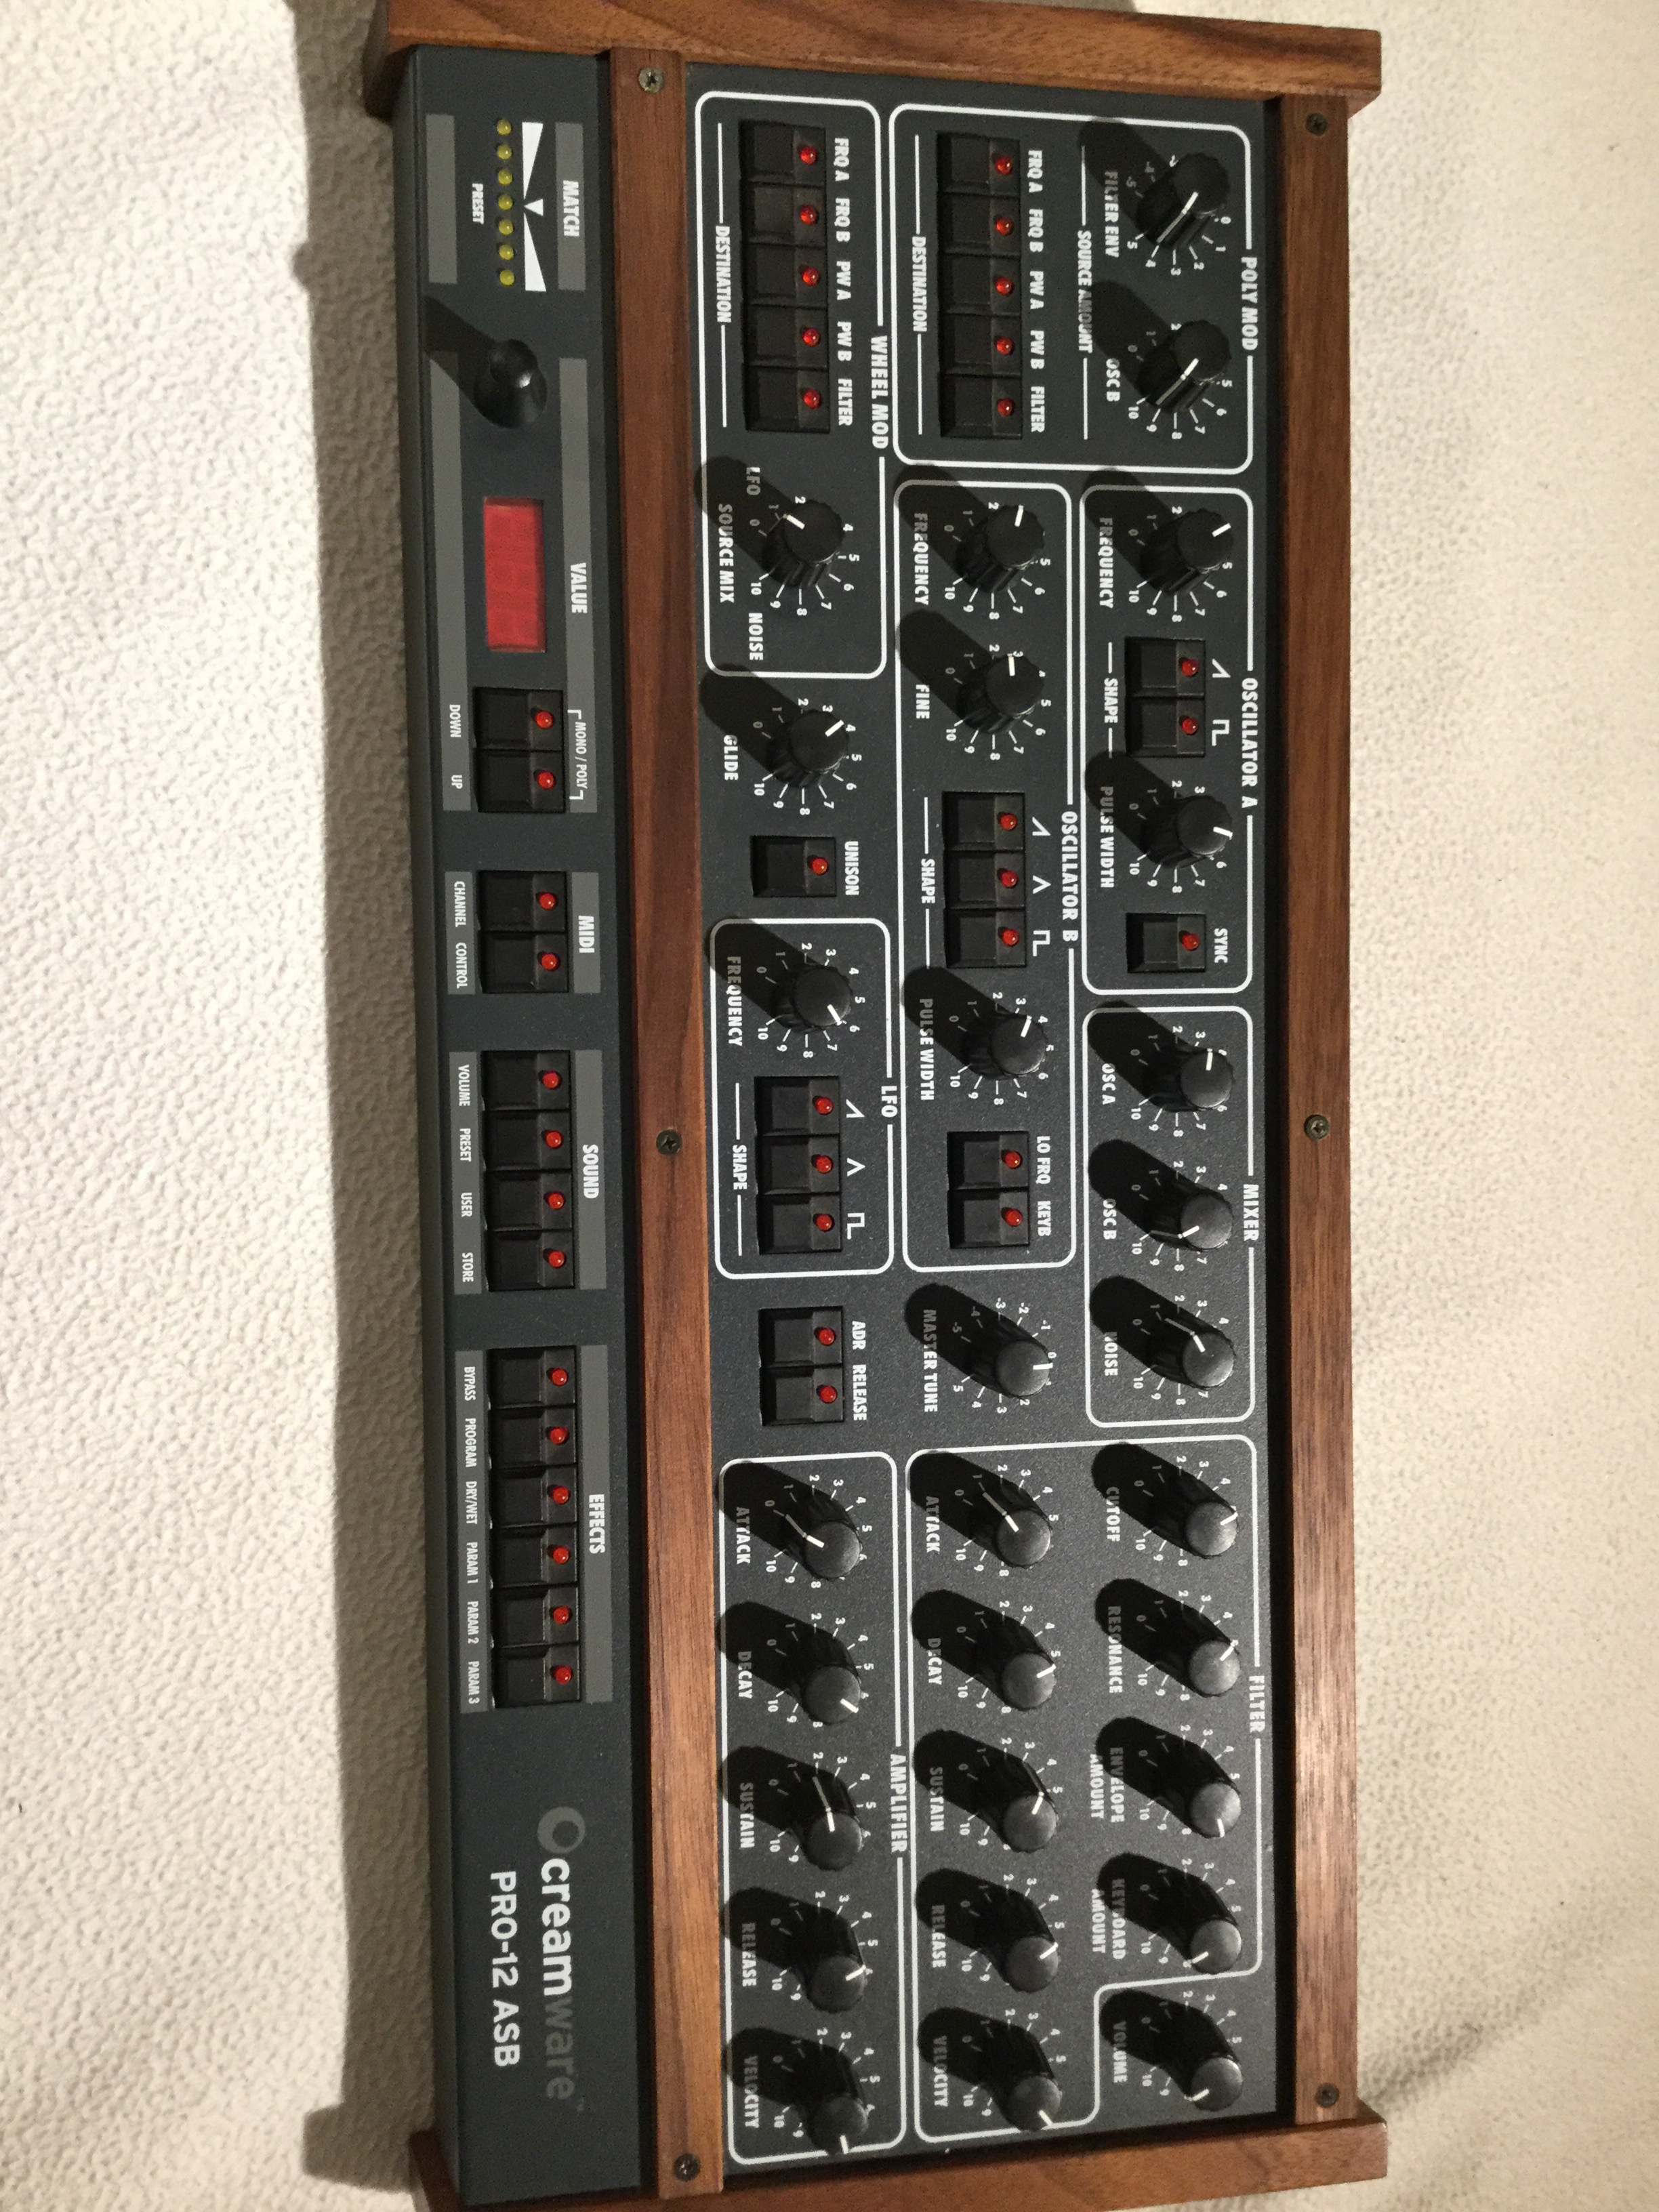
A brilliant virtual-analog recreation of Sequential Circuit’s Prophet-5 – unfortunately, some important parameters can not be reached from the hardware.
Wouldn’t it be nice if you had a controller for every aspect of this thing?
A brilliant virtual-analog recreation of Sequential Circuit’s Prophet-5 – unfortunately, some important parameters can not be reached from the hardware.
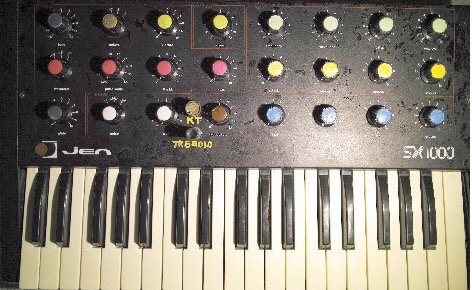
This JEN SX-1000 belongs to Stéphane in France, who wrote to tell me of the three mods he did. I have never seen two of them before – a Tremolo control, and variable filter tracking. Which would make Gordon Reid very, very happy.
So here is Stéphane’s letter:
„Hello, here are some modifications for the Jen synthetone SX1000. Nothing is disconnected. Components are added.“
Ah, yes, GAS, Gear Acquisition Syndrome. It happens to the best of us. So if the thought of a new hardware super-controller by Stereoping is giving you sweaty palms, especially as you learn that it will also be available for Microwave, MKS-80, and Rhodes Chroma, you’d better not read on. The specs I’ve got for you would only make you GAS much, much worse.
Weiterlesen
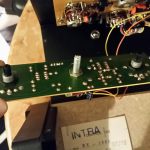
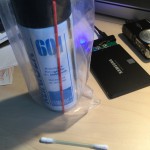
A bit of TLC for my oldest synthesizer: Jenny is getting a new potentiometer. As the synth’s pots were rather cheap, open types that gather dust, and are 40 years old now, they have become all scratchy and jumpy. As I have mentioned before, I am not the greatest fan of Kontakt spray and similar solvents/cleaners, so I bought replacements. But I never found the time to actually replace them.

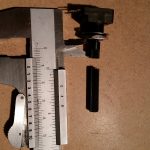
This knob is a good place to start: The „glide“ potentiometer is in charge of portamento, and it is one of the first things that might make Jenny fail (see Neil Johnson’s site). A faulty glide pot means that the synth will only ever play the same note regardless of which key you press. So I did replace that pot, which is pretty straightforward – you’ll find some pictures in this gallery. (It is a 2.2M linear type BTW.)
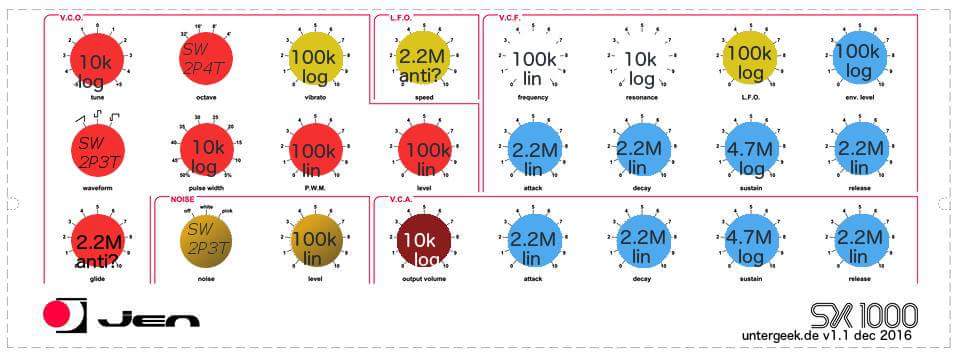
This is an overview of the potentiometer values, some of them are linear, some logarithmic, a few antilog. The most obvious candidates for replacement, apart from the glide pot, would be Frequency (100k) and Resonance (100k) for the filter, and Tune (10k).
 Der Grund, warum mein oller, aber treuer Polo neulich höchst melodramatisch mit dampfendem Motor und kochendem Kühlwasser liegen geblieben ist: Das Antriebsturbinen-Rad der Kühlwasserpumpe – also gewissermaßen der Motor für die Kühlung – ist einfach abgebrochen. Dem Mechaniker in der Werkstatt meines Vertrauens ist es spürbar ein Bedürfnis, mir das havarierte Teil zu zeigen. „Inzwischen mache se die nemmer aus Kunststoff“, meint er.
Besser is das.
Extradank an Lars, der uns gerettet hat und nun auch mal in diesem Internet erwähnt ist.
Jenny – my old 70s monosynth – is a beauty, and I love her knobby face. Her smile, though, has yellowed over the decades. So to make Jenny even more attractive, I decided to try and bleach the keys with hydrogen peroxide.
TL;DR: Effect has been minimal, so it’s probably not worth it. But it was fun. If you try it, make the Retrobright bleaching gel, don’t use a hydrogen peroxide bath. And have a good UV source.
Jenny’s keyboard compared to a key from a mid-80s Roland JX8P synth
In School, I used to hate chemistry. Did I mention that I used to hate chemistry? Okay, I did (when successfully reviving Jenny’s keyboard contact springs by cooking them)
So here’s what I did.
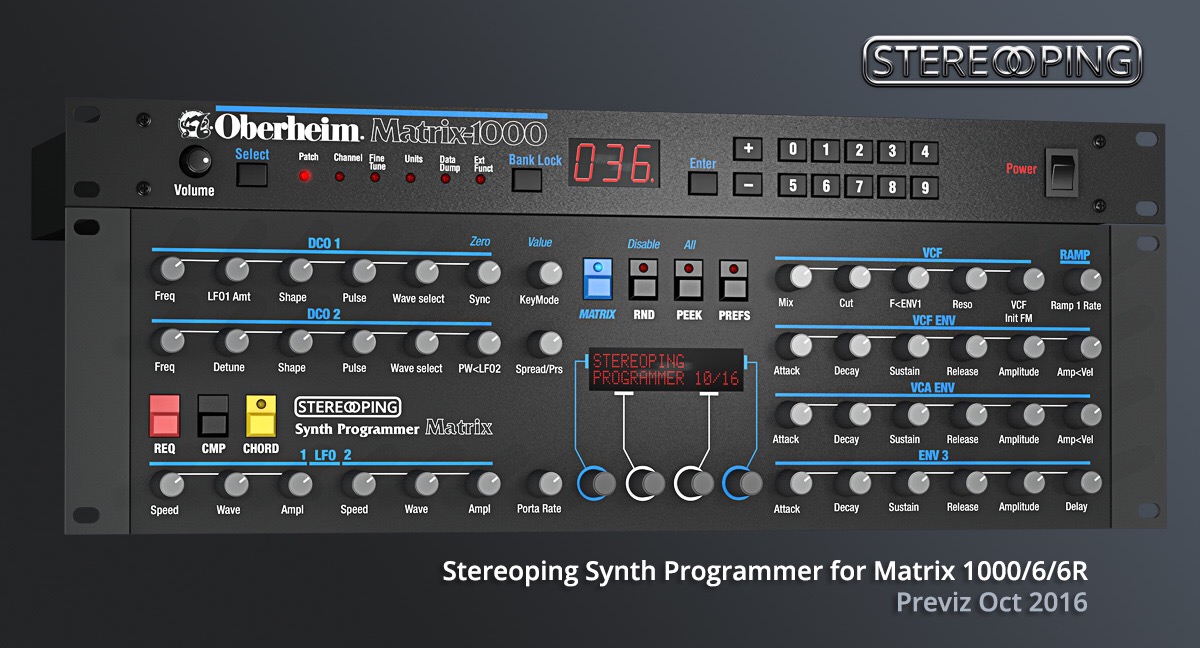
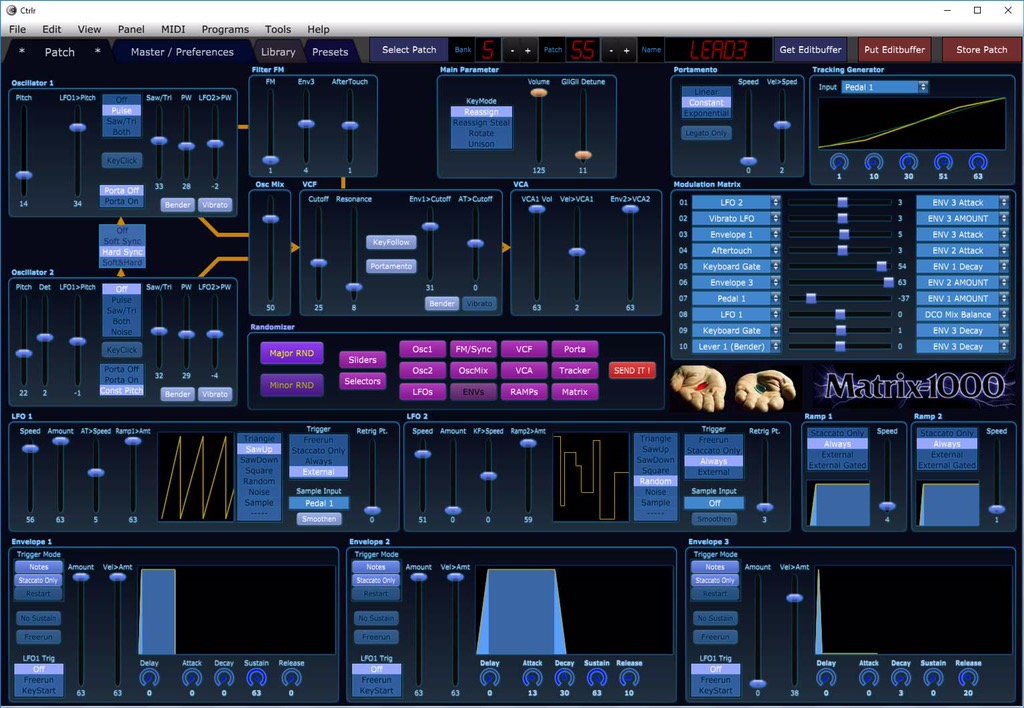
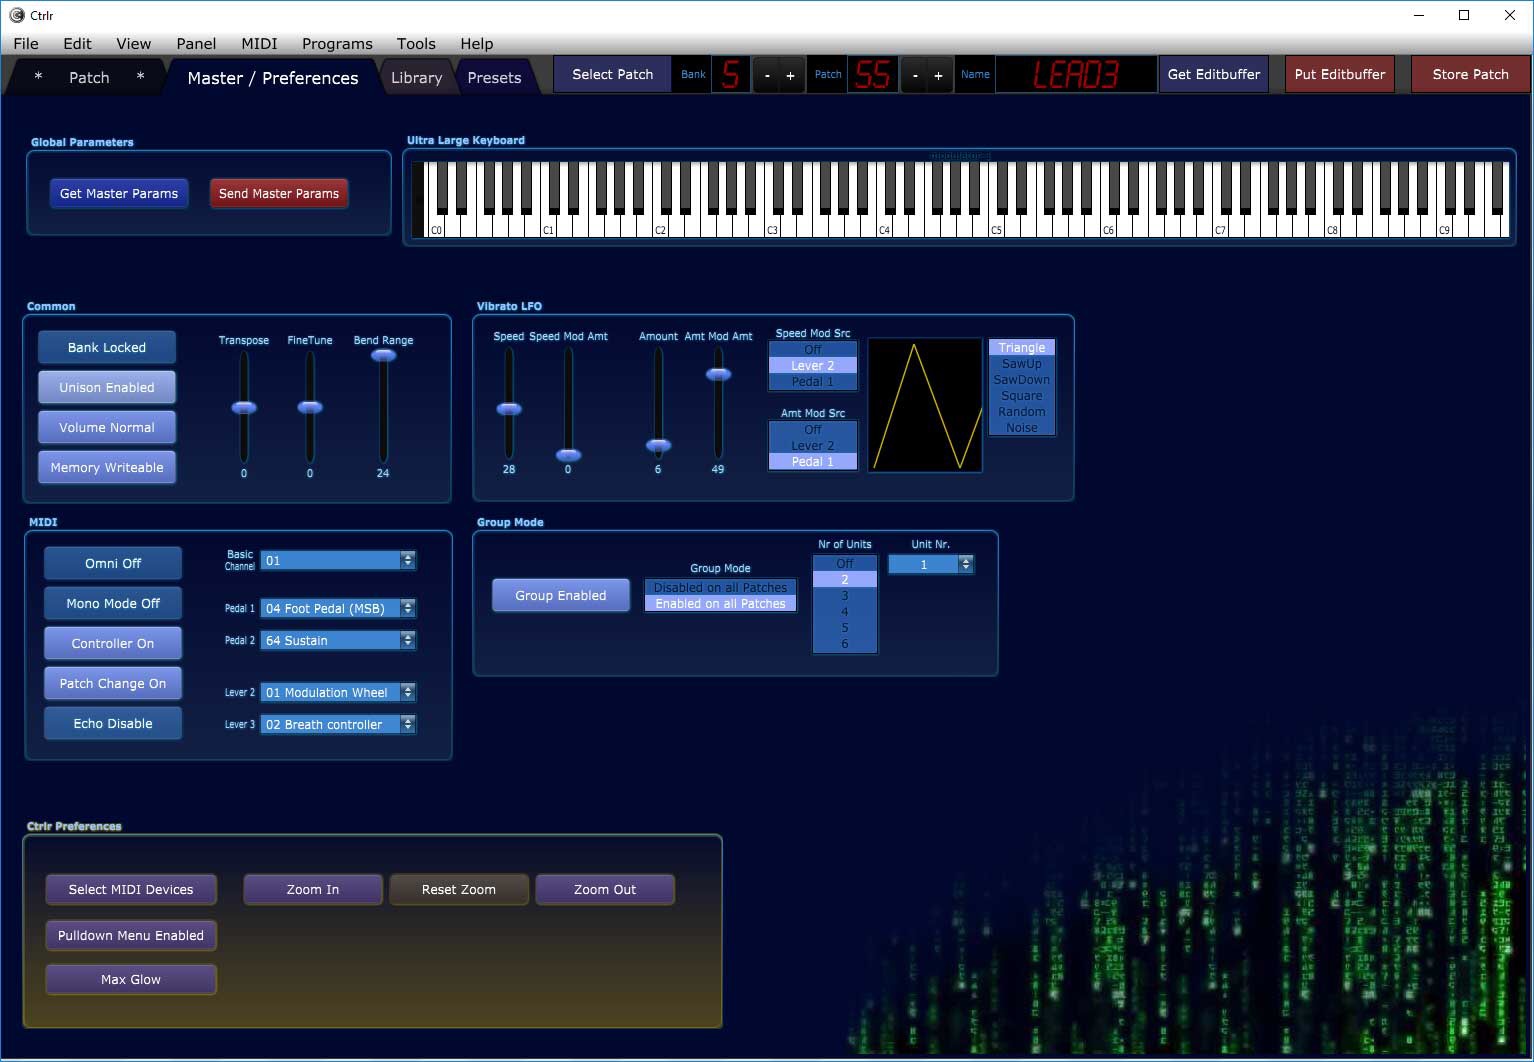
UPDATE: Possemo’s Matrix-1000 panel for Ctrlr has been released and is free to download here.
As teasers go, I’d give it only a 0.3 on the Behringer scale – but it’s for something that I am not directly involved in, so it’s a bit shameless from me. But Chris, who is working on this, has kindly allowed to use these screenshots from his upcoming editor/librarian/controller panel for Ctrlr, the open-source multi-controller. Available for Windows, Mac, and Linux (!)
Granted, there is already a Matrix editor panel, but it’s been in permanent Beta, and Chris’s panel simply looks great, from the layout of the controls, via the Matrix-movie branding, to the randomizer (brought up by clicking on the red pill, of course!). So: stay tuned!


Über den WAF, den „Women’s Acceptance Factor“, habe ich mich schon öfter ausgelassen – eine Umschreibung für die unbestreitbare Tatsache, dass sich tolle Technik für normale Erwachsene nicht immer ganz so toll darstellt und anfühlt wie für den Normalnerd. Um so stolzer bin ich auf dieses leicht nerdige Geschenk:
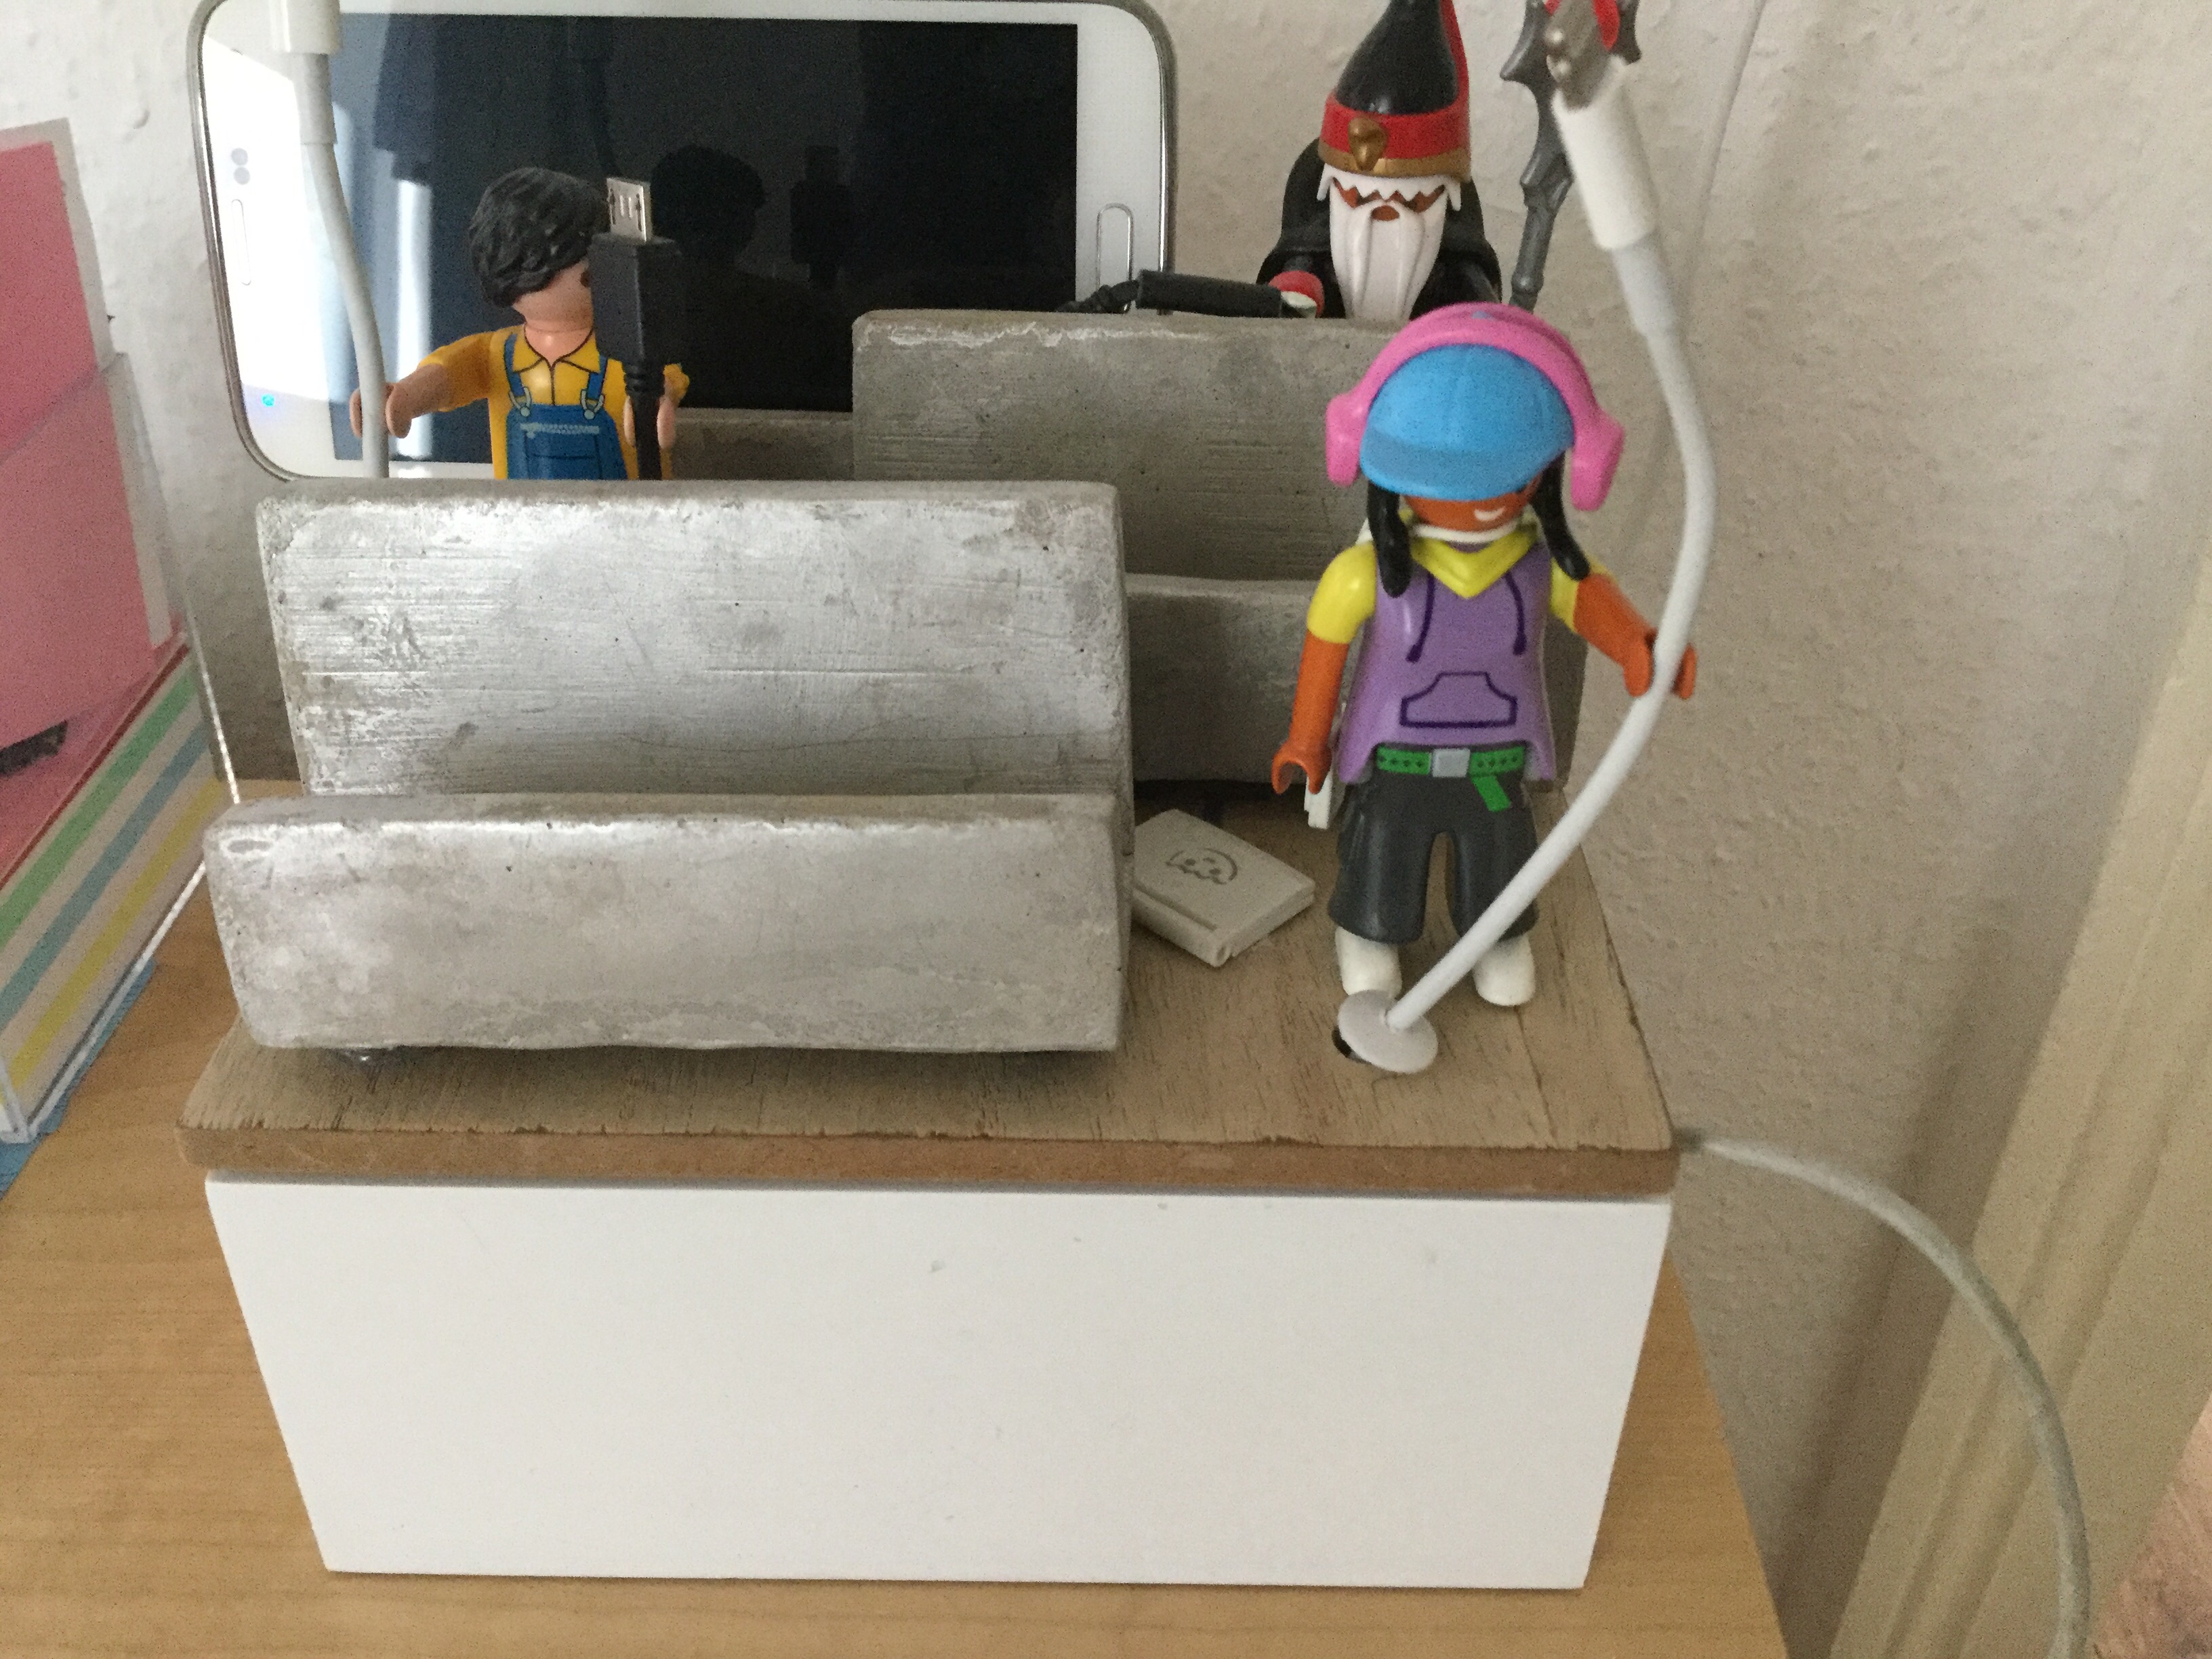
In diesem kleinen Kästchen befindet sich ein Ladegerät, das parallel zwei Android- und iOS-Geräte laden kann und dabei allen Kabelsalat vor den Bewohnern der Wohnung versteckt. (Das Kabel, das an der Seite herausragt, ist nur temporär eingesteckt, um noch einen alten iPod laden zu können.

Wahnsinn: Dieser Handwerker hat Android- UND iOS-Ladekabel dabei. Und muss nicht nochmal zurück in die Werkstatt, um den fehlenden Adapter zu holen.
Die Micro-USB-Ladekabel habe ich mit einem Aufroller eingebaut, der ein ungenutztes Kabel wieder ins Kästchen zurückzieht, für die iOS-Kabel habe ich mir das gespart – die sind ohnehin anfällig genug. Die Bänkchen sind kleine gipserne Kärtchenhalter aus dem Dekoshop, mit Silberlack angesprüht. Wirkt römisch.
So sieht’s von innen aus:

Tatsächlich kam das Geschenk gut an und wird seit geraumer Zeit freudig genutzt. Kleiner Nachteil: Die Playmobil-Figuren ziehen die nicht ganz so erwachsenen Frauen in unserer Familie geradezu magisch an – deshalb ist der Laptop festgeklebt, und manchmal muss ich der Kleinsten den Kopfhörer für das City-Girl wieder abjagen.
Bob Grieb’s brilliant firmware rewrite for the Matrix-6 and Matrix-1000 machines has been in testing for some time. The code seems to be running fine and is definitely a huge improvement: Matrix-6 owners will gain a machine that is much more responsive, and has been ridded of a couple of nasty bugs. And even for Matrix-1000 owners that have been using GliGli’s v1.16 patches, the new software offers, in my humble and slightly biased opinion, great advantages.
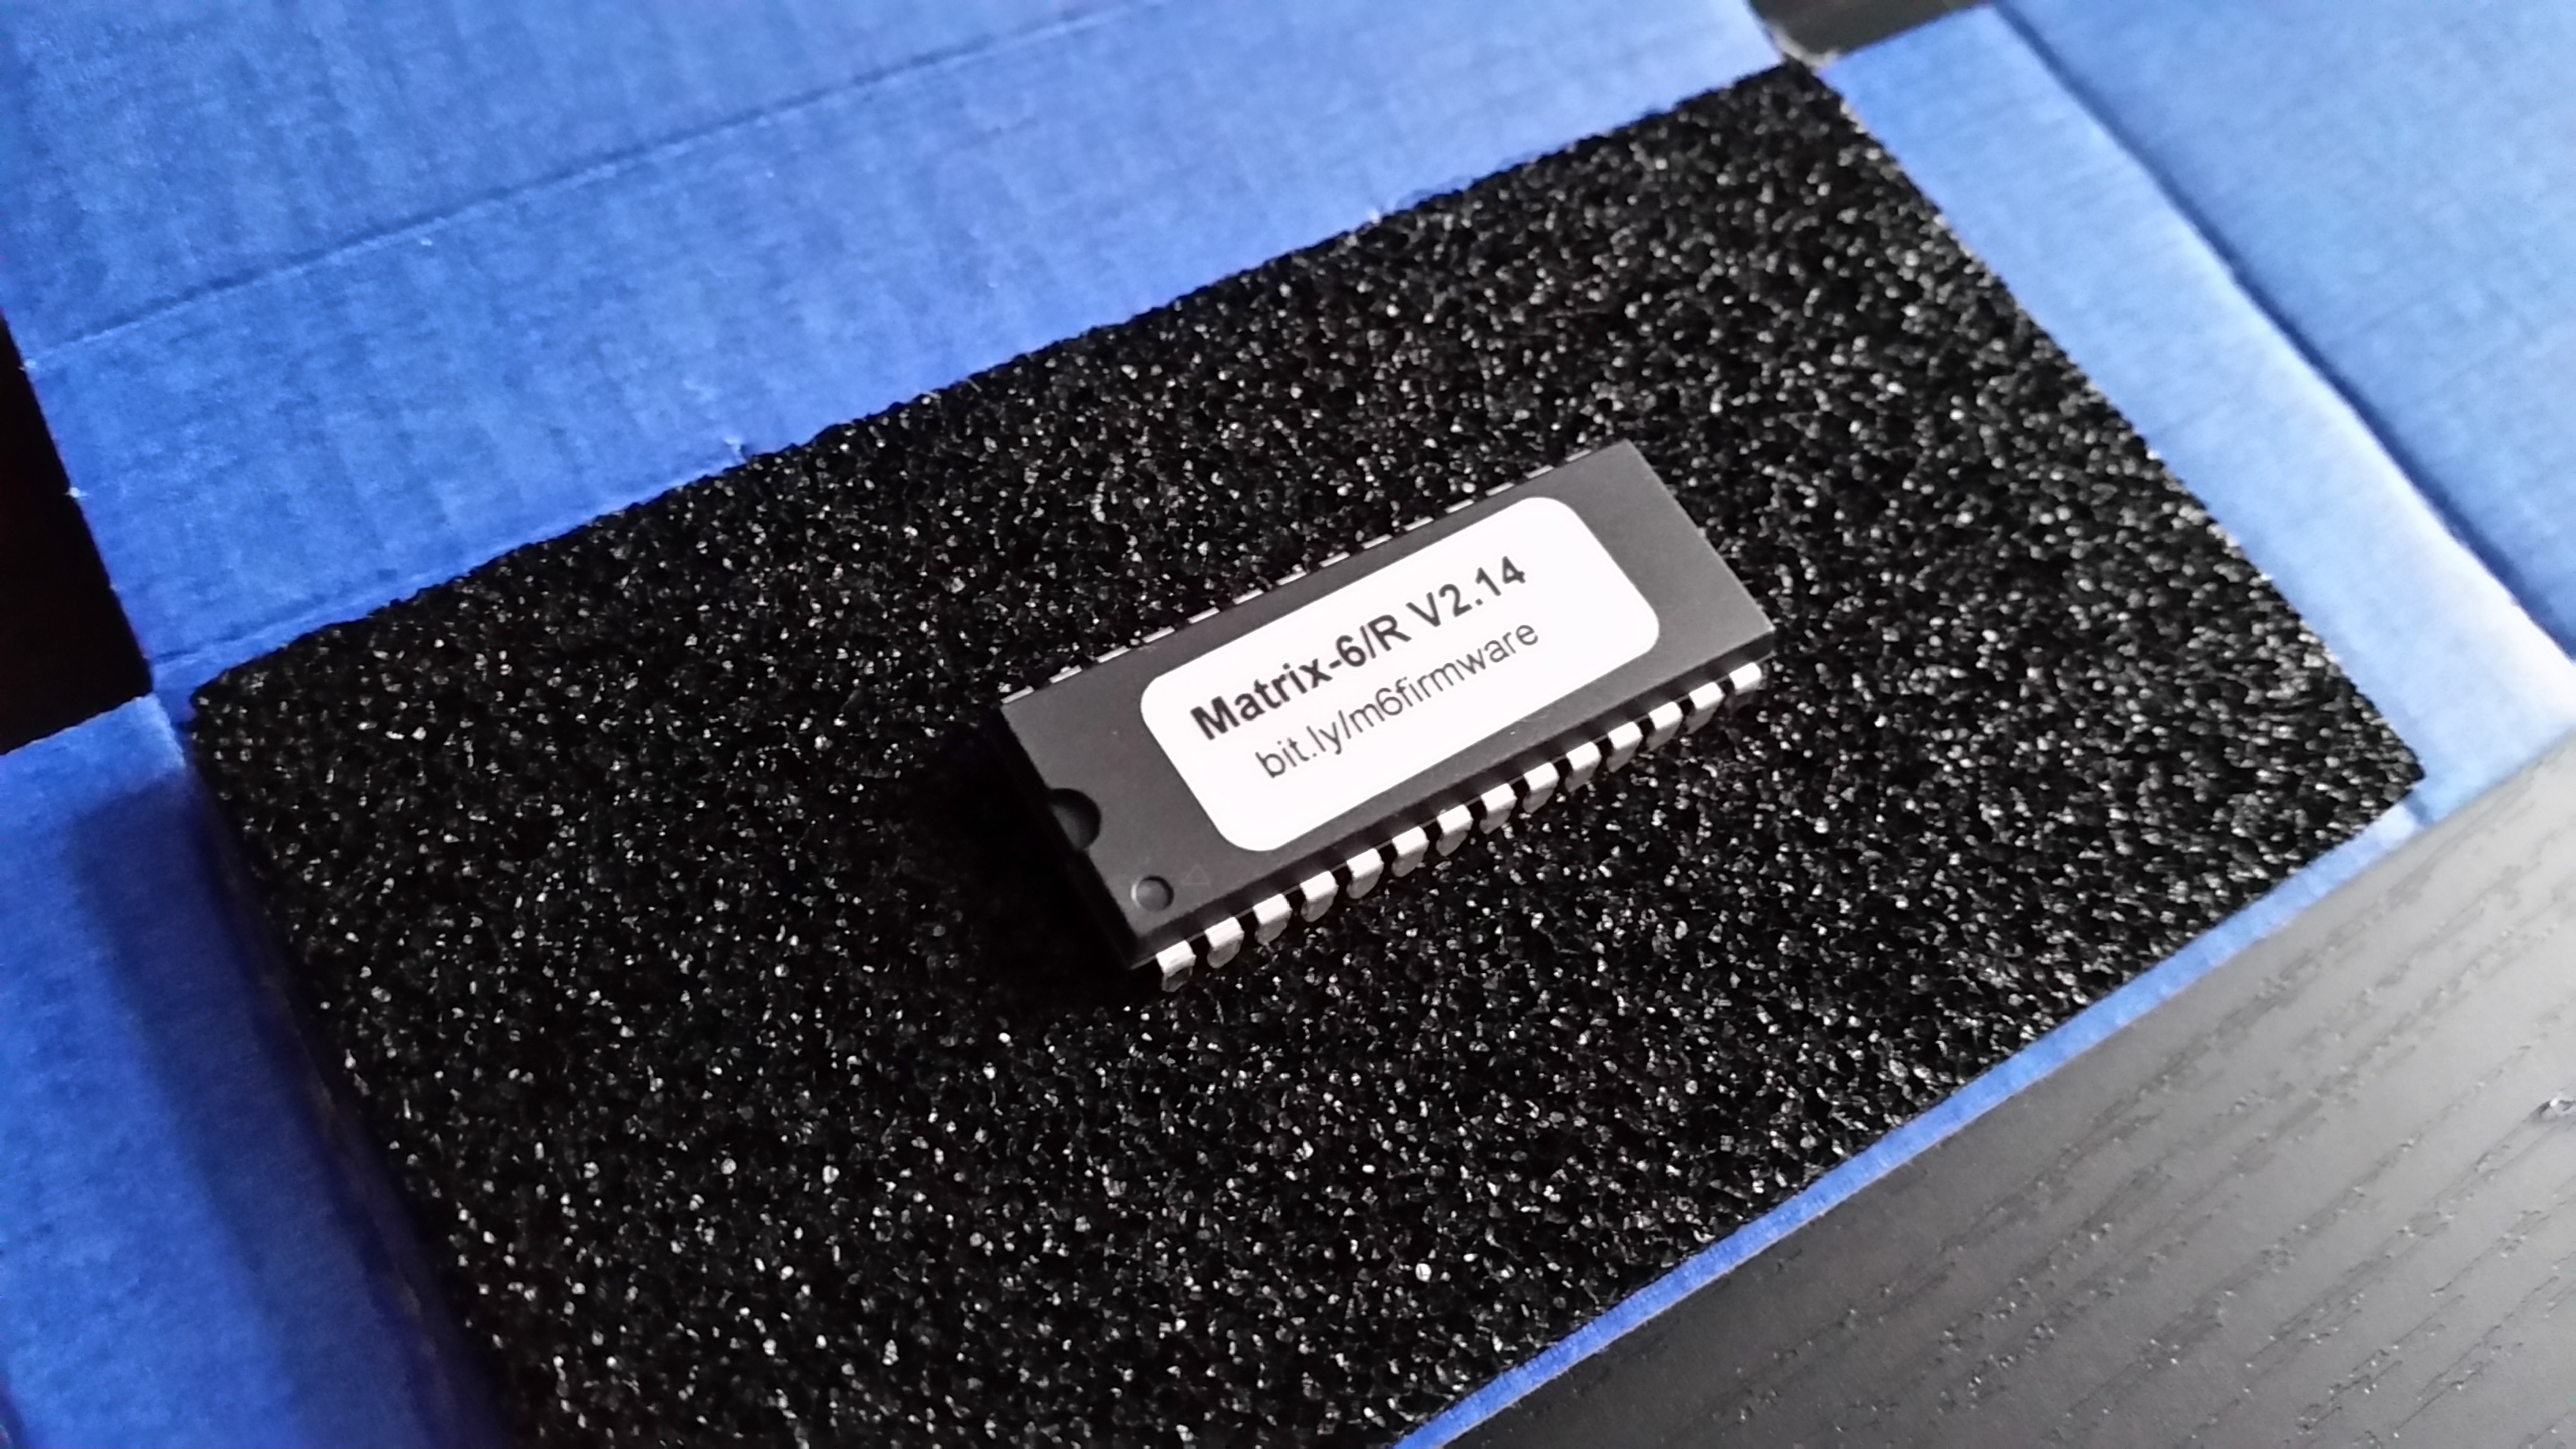
Bob has started shipping EPROM chips containing the new code to people who do not have an EPROMMER available, and I’ve agreed to doing the same thing over in Europe. The price for the update is €25 plus shipping,this contains a payment to Bob as a recognition of the endless hours he spent in analysing and rewriting the code.
You can find a first batch of Matrix-1000 update PROMs on eBay, as well as update PROMS for the Matrix-6 and 6R – if they are gone, just follow one of the links below – there are order forms at the end of those pages.
Update, 25-Jan-2017: Post has been updated to reflect my recent insight that the „self-lubricating“ encoders in the Blofeld use a contact oil which should be replaced to avoid abrasion and wear. My sincerest apologies!
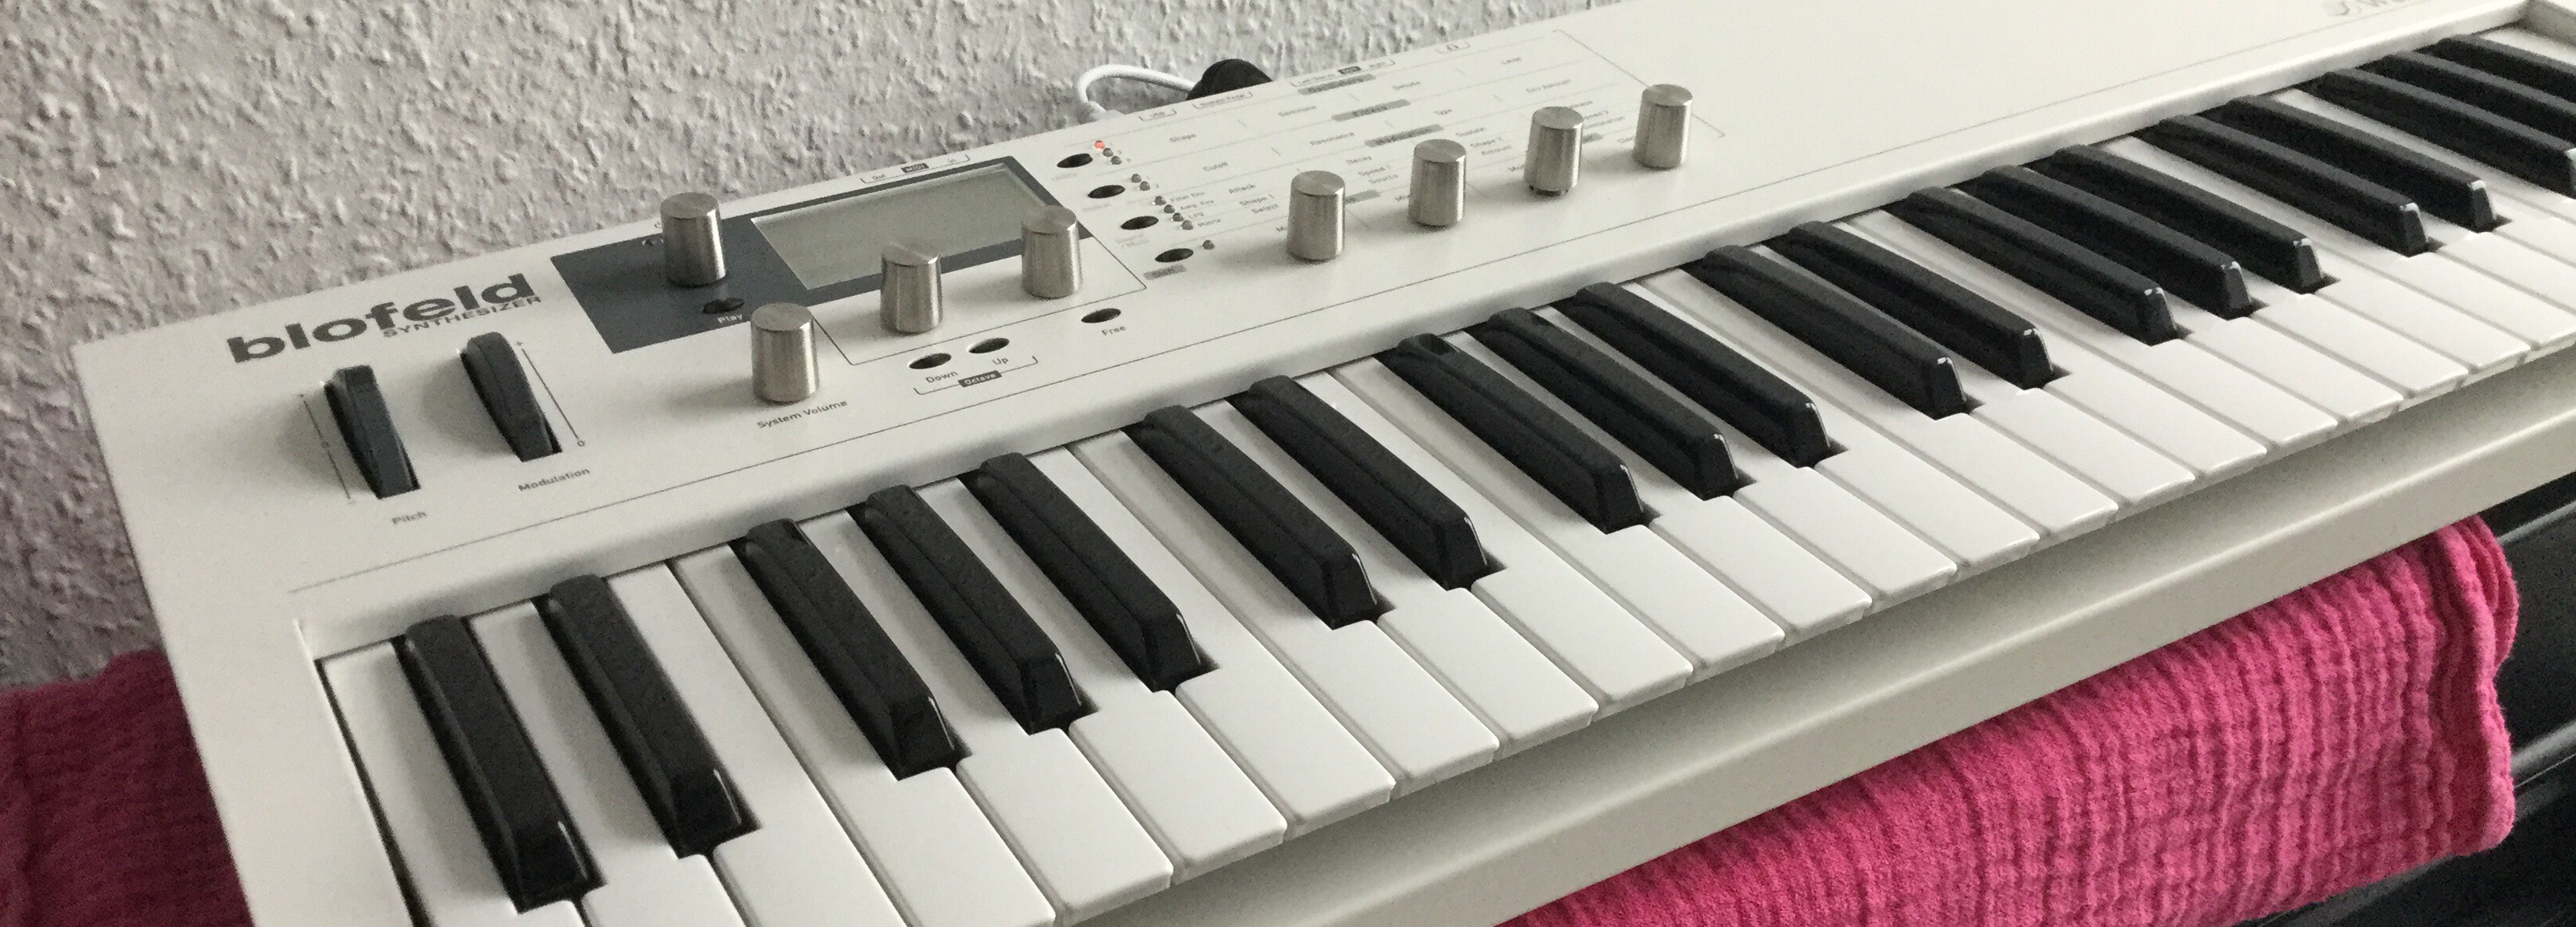
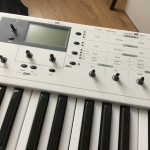
I like my white Blofeld. A very versatile VA synth with a good programming concept, and I am simply smitten with its look and feel. Solid metal, not too bulky or too heavy though, a big friendly graphics display, and a very good keyboard, with very good aftertouch sensibility. Got it really cheap, too.
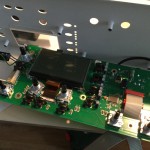
As with the E-MU ESI32 that needed a new backlight, a steel casing means solid build quality – for the mechanical parts. BTW: To take it apart, you have to remove all the screws on the synth’s underbelly – 18 of them, casing screws as well as the ones holding the keyboard. No need to remove the wooden side panels or the rubber feet though. Then, remove all screws holding the electronics board – one of them is under the power switch so it is necessary to remove that switch from the housing by applying gentle pressure from the inside. In short, be warned: it’s a real pain in your lower backside to get the electronics dismounted, so if you do not have a good reason to remove Blofeld’s brain, just don’t.
Jumpy encoders being a very good reason, of course.
One thing that seems to plague the Blofeld, keyboard and desktop versions alike, is that the encoders are likely to behave eratically; they tend to become jumpy an unrealiable. Achim at stromeko.net, who has loads of insight into and experience with Waldorf synths and their tech, recommends soldering in buffer caps, but to make a long story short, I think you might be better off cleaning, lubricating, and bending rather than only soldering. I’d suggest addressing the mechanical problems first.
My Blofeld did indeed suffer misbehaving encoders. The two under the display were the worst, the ones that you use the most in tweaking sounds. This type of behaviour is not new to me; I fixed a Micro Q once, the Blofeld’s predecessor that had suffered from the same erratic encoder behaviour – after years of use. They still use the same kind of encoder – and these are easy to open and clean.
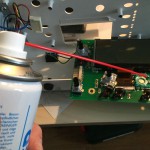
 Once again, it proved that most problems in electronics are mechanical by nature – in my Blofeld, the encoders had been greased to ensure smooth operation, but a surplus of grease had seeped into the contacts. Update: Or so I thought – in fact it may be a special kind of grease to protect the contacts; you may use Kontakt-61 or a similar lubricant intended for contacts.
To fix the mechanical problems, carefully bend the pickup contacts on the rotor just the tinyiest bit higher to increase pressure After cleaning the encoder, and after re-applying the contact oil, encoder operation is now flawless.
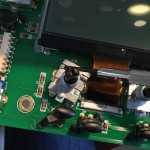
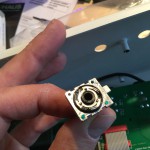
The encoders are held together by four metal tongues from a very soft metal. It is very hard to bend it back into position so that it closes the encoder without play; a drop of hot glue holds the top in place and is easily removed if the encoder is due for maintenance again.
One final note: The main encoder left of the display is of a slightly different type where the metal tongues have to be straightened to pass through a hole in the top part of the housing. Extra care needed with that.