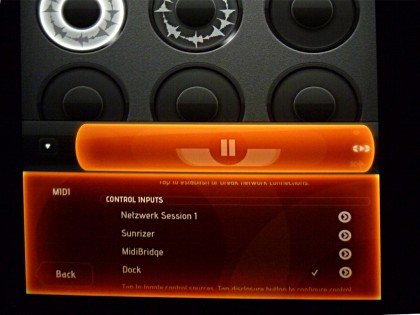
I’ve put my modded IO Dock on eBay!

It’s the first ever IO Dock outside Alesis’ labs to feature a USB hub, it’s the most successful project in this blog, and I am selling it. 20140523-105055-39055060.jpg
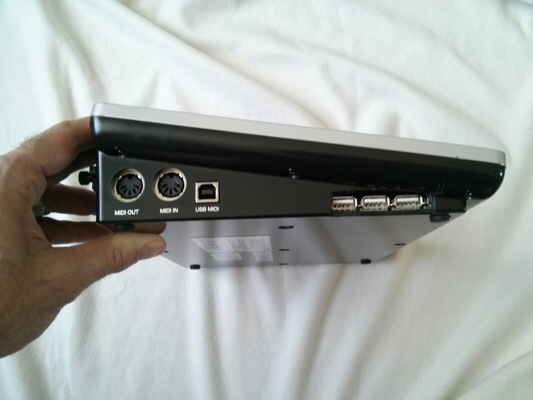
It was a simple hack on a crazy notion, and I’m really happy how it all turned out, getting noted by Discchord and Synthopia and others. More importantly, it’s a simple solution for a real problem, and it just works.

I’m also a lot more confident that it’s a good hack: The modified IO Dock has been in use at home and in the band for over a year, and the hack has been successfully replicated by some very smart hackers – over at Churchnerd’s blog you’ll not only find a description how to do it that is way better than mine, he also found a simple and elegant way to make the modded dock work with the iPad Air.

So why am I selling? I’ve got a good reason: Money. :) Apart from that, I am using an iPad Air now and switched over to another interface – a third-hand Novation X-Station keyboard/synth/fx combi with class-compliant USB Midi and Audio in/out. Best solution in the practice room for the time being, and if I’m getting a good price on my IO Dock, I might go out and get a Focusrite iTrack Dock to use at home.

However, I encourage you to try the hack for yourself, and I am confident that it will work with the new, lightning connector enabled, IO Dock 2. (Update: unfortunately, it doesn’t.)

A couple of things I have learned:

  • Some people are really scared by the bullshit warnings that advise you not to open the housing.
  • Anybody who can solder a cable can do it.
  • The hub matters. I was lucky to pick an active hub that works in my setup, a Belkin F5U404. If the hack does not work, and you have excluded switched in/out ports and messed-up USB connections as the cause, you may try another powered hub.
  • Use connectors, don’t solder it into the IO Dock – although you need 2mm pinstripe plugs/sockets like these that may be a bit hard to find, it is worth the effort: you’ll be able to test and reverse the hack.
  • Lab-test first. Dremel later. Before soldering or dremeling anything in the Dock, start with a simple workbench test – open the Dock, unplug the connector for the iPad, connect it to the hub with the modified cables you’ve made.
  • If you overload the IO Dock by drawing too much USB current, it just shuts down. So far, no harm has been done, still I think it’s a good idea to be careful and never connect more than one 500mA device.
  • When you are hacking the IO Dock anyway, you might think about adding a power-on LED connected to the hub’s 5V supply – I always regretted not having done this.

One thing left to do: Many, many thanks for all the feedback, the ideas and the improvement. It made it all worth while. Whatever the turnout of my auction is.
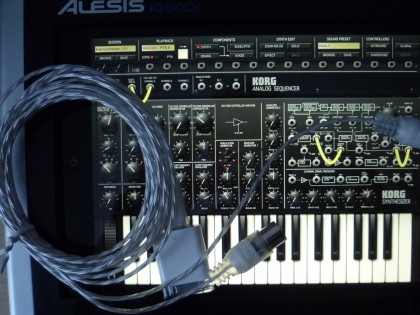
iPad Air: Shut up and take my money!

Yes, I know. We’re all a bit disappointed with the “New New New iPad”, a.k.a. iPad Air. And remember what Apple pulled off when they discovered that they had a game-changing new component, the Retina display, but the overall hardware wasn’t up to the level yet – they sold it as the iPad 3, only to be replaced with the iPad 4 less than a year later.

No, I’m not bitter with Apple over that. Well yes, I am, but the problem with my iPad 3 is that processing power has become an issue when using it for making music – an important use case for me. Waldorf’s Nave is a dream of a soft synth, but it’s pushing my iPad to the limit – run Nave, and you won’t be able to run much else. So processing power is increasingly becoming the driving force in deciding on what to buy and when.

The least thing that you could say about the iPad Air is that it’s going to drive down the prices for iPad 4’s. But considered that the Air is sporting a variant of the last-generation Apple A7 processor, you can expect it to have about double the processing power of an iPad 4, or about six times the performance of the iPad 3. That’s presumably worth a hundred Euros extra.

To get rid of the iPad3 now might be a good idea anyway. See Tim Webb’s analysis over at Discchord:

The iPad 3 shipped with an inferior processor incapable of keeping up with the huge retina display, and suffered a life-time of sluggish performance and annoying bugs. Developers consistently tell me that the majority of their bug reports come from iPad 3 users.

Now there you go. Unfortunately, this means that my carefully hand-modded IO Dock becomes obsolete – the iPad Air, due to its smaller bezel and different overall dimensions, just won’t fit, and there’s the issue of the Lightning connector which the IO Dock doesn’t have – although there are reports that an adapter would work, this would mean additional tinkering, soldering, dremeling. With hardly any chance of producing satisfactory results.

So what I’ll probably do is build a USB setup from scratch, with a modded Lightning-to-USB-adapter capable of charging the iPad; maybe with a powered hub, and a multi-channel interface like the Akai EIE. (Good list of class-compatible, iPad-friendly devices here.) It’s far from perfect, and maybe sometime I’ll integrate it into my own Dock. Once again, terra incognita.

Proof-of-concept: Alesis IO Dock bekommt einen Hub

iPad im IO Dock - macht das Midikabel am wackeligen Camera Connection Kit überflüssig

iPad im IO Dock – macht das Midikabel am wackeligen Camera Connection Kit überflüssig

Am Alesis IO Dock führt kaum ein Weg vorbei, wenn man mit dem iPad Musik machen möchte. Zugegeben: man kann Verstärker auch an den Kopfhörerausgang anschließen, und für die Verbindung zum Midi-Masterkeyboard sorgt auch die Kombination aus Camera Connection Kit und einfachem Midi-Adapter. Wirklich betriebssicher ist das nicht, dafür sorgt allein der 30-polige Apple-Stecker. Das IO Dock gibt dem iPad nicht nur eine stabile Heimstatt, in der es mit Strom versorgt wird, es bietet vor allem exzellente Audio-Ein- und Ausgänge in stereo, einen regelbaren Kopfhörerausgang, Goodies wie Phantomspeisung für Kondensatormikros und Midi- Ein- und Ausgänge. Unverzichtbar.

In einem Punkt ist das IO Dock einem Camera Connection Kit allerdings unterlegen: es bietet keine Möglichkeit, zusätzliche USB-Geräte einzuschleifen. Bei mir wäre das ein kleines Masterkeyboard namens M-Audio Axiom; man kann es entweder über die klassische Midi-Schnittstelle anschließen – wobei es seinen Strom dann über ein klassisches 12V-Steckernetzteil bekommt – oder einfach über USB: dann hat das Keyboard nicht nur Anschluss, sondern wird auch gleich über die USB-Speisespannung mit Strom versorgt. Man muss nur darauf achten, einen USB-Hub mit eigener Stromversorgung zwischenzuschalten, weil das iPad auf alle größeren Verbraucher äußerst allergisch reagiert.

1 Netzteil sparen, 1000 neue Möglichkeiten gewinnen

Wäre es nicht schön, das Keyboard direkt an das IO Dock anschließen zu können und auf diesem Weg ein Netzteil (a.k.a. “Wandwarze”) loszuwerden? Leider hat das Dock den falschen Stecker: An den eingebauten USB-B-Stecker (das sind die fast quadratischen, wie sie sich in Druckern und externen Festplatten finden) muss man irgendwo einen Computer anschließen. Ein USB-Bus braucht nämlich einen Master – einfach nur einen Hub anzustöpseln würde nicht reichen. Was aber auch heißt: es gibt leider keine einfache Möglichkeit, weitere USB-Peripherie anzustöpseln – sei es ein weiteres Audio-Interface, sei es eine Kamera, sei es ein Keyboard. Spätestens, wenn mein von mir via Kickstarter stolz mitfinanzierter Superluxus-Musik-Controller kommt, ist das kein Zustand mehr – der hat nämlich ohne Zusatz-Hardware gar kein Midi mehr, und ich wäre gekniffen.

Deshalb reifte in mir schon länger die Vorstellung, dem IO Dock mit einem kleinen chirurgischen Eingriff einen Extra-Hub zu verpassen. Der könnte Geräte wie mein Keyboard problemlos mit Strom versorgen – und für ausreichend Anschluss sorgen. Seit heute weiß ich, dass das nicht nur eine theoretische Möglichkeit ist: man kann den Hub zwischen iPad und Dock einschleifen – und wie beim Camera Connection Kit ist das iPad dann der USB-Master. Das IO Dock funktioniert wie gewohnt, aber man kann weitere Geräte anschließen und aus dem Hub mit Strom versorgen. Das lässt sich alles sogar bequem ins IO Dock einbauen!

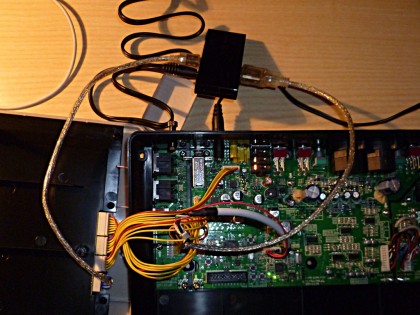
Testweise frei verdrahtet: Ein USB-Hub "im" IO Dock

Testweise frei verdrahtet: Ein USB-Hub “im” IO Dock

Loopy HD erkennt das Dock ohne Probleme - trotz zwischengeschleiften Hubs.

Loopy HD erkennt das Dock ohne Probleme – trotz zwischengeschleiften Hubs.

Wie das lief, darüber demnächst mehr. Detailliertes Howto und Video folgen, wenn der Einbau fertig ist.

Nebenbei: Wahnsinn, was sich alles getan hat, als ich mich über die Unstimmigkeiten der Musiksoftware auf dem iPad ausgemährt habe. In diesem Dreivierteljahr sind viele der Probleme, die ich beschrieben habe, verschwunden; die Software ist erwachsen geworden. Man kann ihr regelrecht beim Reifen zusehen. Und großen Anteil daran haben Einzelkämpfer wie der Loopy- und Audiobus-Entwickler Michael Tyson. Wie die sich mit ihrer Nutzergemeinde austauschen, um Bugs auszubügeln und neue Features zu erfinden, ist großartig. Wäre doch nur Apple auch so offen – dann wäre uns der zu nichts kompatible Steckverbinder im neuen neuen iPad erspart geblieben, es würde weiter ins IO Dock passen und ich hätte mir mit Sicherheit eins gekauft – die zusätzliche Prozessorleistung kann man für Musik gut brauchen. Seufz.